2010年6月30日星期三

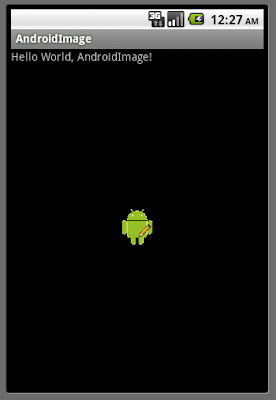
從SD Card加載圖像視圖(ImageView), 使用BitmapFactory.

從SD Card加載圖像視圖(ImageView)

先參考前文, 創建包含有SD Card的Android Virtual Devices(AVDs), 並把圖片文件複製到SD Card中.

/sdcard/androidbiancheng.png

仍沿用上文"從內部文件夾加載圖像視圖(ImageView)"中main.xml

AndroidImage.java
package com.AndroidImage;

import android.app.Activity;
import android.graphics.Bitmap;
import android.graphics.BitmapFactory;
import android.os.Bundle;
import android.widget.ImageView;

public class AndroidImage extends Activity {

private String imageFile = "/sdcard/androidbiancheng.png";

/** Called when the activity is first created. */
@Override
public void onCreate(Bundle savedInstanceState) {
super.onCreate(savedInstanceState);
setContentView(R.layout.main);

ImageView myImageView = (ImageView)findViewById(R.id.imageview);
Bitmap bitmap = BitmapFactory.decodeFile(imageFile);
myImageView.setImageBitmap(bitmap);
}
}

相關文章:
從內部文件夾加載圖像視圖(ImageView)
從網絡加載圖像視圖(ImageView)
利用BitmapFactory.Options的inSampleSize對bitmap進行優化

從內部文件夾加載圖像視圖(ImageView)

從內部文件夾加載圖像視圖(ImageView)

先創建新內部文件夾/res/drawable, 並把圖片文件儲存其中.


main.xml
<?xml version="1.0" encoding="utf-8"?>
<LinearLayout xmlns:android="http://schemas.android.com/apk/res/android"
android:orientation="vertical"
android:layout_width="fill_parent"
android:layout_height="fill_parent"
>
<TextView
android:layout_width="fill_parent"
android:layout_height="wrap_content"
android:text="@string/hello"
/>
<ImageView
android:id="@+id/imageview"
android:layout_gravity="center"
android:layout_width="fill_parent"
android:layout_height="fill_parent"
android:scaleType="center"
/>
</LinearLayout>


AndroidImage.java
package com.AndroidImage;

import android.app.Activity;
import android.os.Bundle;
import android.widget.ImageView;

public class AndroidImage extends Activity {
/** Called when the activity is first created. */
@Override
public void onCreate(Bundle savedInstanceState) {
super.onCreate(savedInstanceState);
setContentView(R.layout.main);

ImageView myImageView = (ImageView)findViewById(R.id.imageview);
myImageView.setImageResource(R.drawable.androidbiancheng);
}
}


相關文章:
從SD Card加載圖像視圖(ImageView)
從網絡加載圖像視圖(ImageView)
利用BitmapFactory.Options的inSampleSize對bitmap進行優化

2010年6月25日星期五

通過自定義視圖(Custom View)創建自定義按鈕(Custom Button)

前文描述過如何"建立自定義視圖", "通過XML調用自定義視圖", "處理自定義視圖的事件"和"調用invalidate()強制重繪View"等等. 自定義視圖也可以用來創建自定義按鈕.
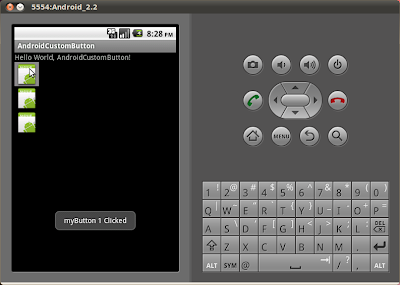
通過自定義視圖(Custom View)創建自定義按鈕(Custom Button)

修改main.xml添加三個自定義按鈕
<?xml version="1.0" encoding="utf-8"?>
<LinearLayout xmlns:android="http://schemas.android.com/apk/res/android"
android:orientation="vertical"
android:layout_width="fill_parent"
android:layout_height="fill_parent"
>
<TextView
android:layout_width="fill_parent"
android:layout_height="wrap_content"
android:text="@string/hello"
/>
<com.AndroidCustomButton.MyButton
android:id="@+id/mybutton1"
android:layout_width="wrap_content"
android:layout_height="wrap_content"
/>
<com.AndroidCustomButton.MyButton
android:id="@+id/mybutton2"
android:layout_width="fill_parent"
android:layout_height="wrap_content"
/>
<com.AndroidCustomButton.MyButton
android:id="@+id/mybutton3"
android:layout_width="fill_parent"
android:layout_height="fill_parent"
/>
</LinearLayout>


擴展View類, 創建自定義按鈕, MyButton.java
package com.AndroidCustomButton;

import android.content.Context;
import android.graphics.Bitmap;
import android.graphics.BitmapFactory;
import android.graphics.Canvas;
import android.graphics.Color;
import android.graphics.Paint;
import android.graphics.Rect;
import android.util.AttributeSet;
import android.view.View;

public class MyButton extends View {

private final int defaultImageRes = R.drawable.icon;
private Bitmap buttonBitmap;

public MyButton(Context context) {
super(context);
// TODO Auto-generated constructor stub
init(context);
}
public MyButton(Context context, AttributeSet attrs) {
super(context, attrs);
// TODO Auto-generated constructor stub

init(context);
}

public MyButton(Context context, AttributeSet attrs, int defStyle) {
super(context, attrs, defStyle);
// TODO Auto-generated constructor stub
init(context);
}

private void init(Context context){

/*
buttonBitmap = BitmapFactory.decodeResource(context.getResources(),
getResources().getIdentifier(defaultImage, null, null));
*/

buttonBitmap = BitmapFactory.decodeResource(context.getResources(), defaultImageRes);

setBackgroundColor(Color.BLACK);
this.setFocusable(true);
this.setClickable(true);
}

int minWidth(){
return buttonBitmap.getWidth();
}

int minHeight(){
return buttonBitmap.getHeight();
}

@Override
protected void onMeasure(int widthMeasureSpec, int heightMeasureSpec) {

setMeasuredDimension(measureWidth(widthMeasureSpec), measureHeight(heightMeasureSpec));
}

private int measureWidth(int measureSpec) {
int specMode = MeasureSpec.getMode(measureSpec);
int specSize = MeasureSpec.getSize(measureSpec);

if (specMode == MeasureSpec.EXACTLY) {
// We were told how big to be
return specSize;
} else if (specMode == MeasureSpec.AT_MOST) {
return Math.min(minWidth(), specSize);
} else {
return minWidth();
}
}

private int measureHeight(int measureSpec) {
int specMode = MeasureSpec.getMode(measureSpec);
int specSize = MeasureSpec.getSize(measureSpec);

if (specMode == MeasureSpec.EXACTLY) {
// We were told how big to be
return specSize;
} else if (specMode == MeasureSpec.AT_MOST) {
return Math.min(minHeight(), specSize);
} else {
return minHeight();
}
}


@Override
protected void onFocusChanged(boolean gainFocus, int direction,
Rect previouslyFocusedRect) {
// TODO Auto-generated method stub
super.onFocusChanged(gainFocus, direction, previouslyFocusedRect);
if (gainFocus){
setBackgroundColor(Color.GRAY);
}
else{
setBackgroundColor(Color.BLACK);
}
}

@Override
protected void onDraw(Canvas canvas) {
// TODO Auto-generated method stub
Paint paint = new Paint();
paint.setColor(Color.WHITE);
canvas.drawBitmap(buttonBitmap, 0, 0, paint);
}

}


修改主程式代碼
package com.AndroidCustomButton;

import android.app.Activity;
import android.os.Bundle;
import android.view.View;
import android.widget.Toast;

public class AndroidCustomButton extends Activity {

/** Called when the activity is first created. */
@Override
public void onCreate(Bundle savedInstanceState) {
super.onCreate(savedInstanceState);
setContentView(R.layout.main);

MyButton myButton1 = (MyButton)findViewById(R.id.mybutton1);
MyButton myButton2 = (MyButton)findViewById(R.id.mybutton2);
MyButton myButton3 = (MyButton)findViewById(R.id.mybutton3);

myButton1.setOnClickListener(new MyButton.OnClickListener(){

@Override
public void onClick(View v) {
// TODO Auto-generated method stub
Toast.makeText(AndroidCustomButton.this, "myButton 1 Clicked", Toast.LENGTH_LONG).show();
}});

myButton2.setOnClickListener(new MyButton.OnClickListener(){

@Override
public void onClick(View v) {
// TODO Auto-generated method stub
Toast.makeText(AndroidCustomButton.this, "myButton 2 Clicked", Toast.LENGTH_LONG).show();
}});

myButton3.setOnClickListener(new MyButton.OnClickListener(){

@Override
public void onClick(View v) {
// TODO Auto-generated method stub
Toast.makeText(AndroidCustomButton.this, "myButton 3 Clicked", Toast.LENGTH_LONG).show();
}});

}
}

2010年6月23日星期三

異步任務 (AsyncTask)

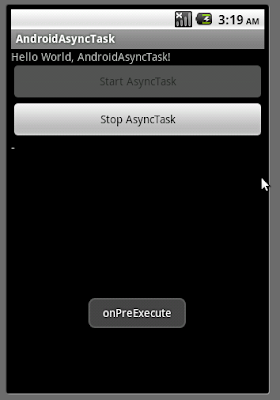
異步任務(AsyncTask)使應用程序可以適當和容易使用的UI線程. 這個類允許執行後台操作並在UI線程公佈結果, 而不必處理線程(thread)和/或處理程序(handler).

異步任務(AsyncTask)

main.xml
<?xml version="1.0" encoding="utf-8"?>
<LinearLayout xmlns:android="http://schemas.android.com/apk/res/android"
android:orientation="vertical"
android:layout_width="fill_parent"
android:layout_height="fill_parent"
>
<TextView
android:layout_width="fill_parent"
android:layout_height="wrap_content"
android:text="@string/hello"
/>
<Button
android:id="@+id/startasynctask"
android:layout_width="fill_parent"
android:layout_height="wrap_content"
android:text="Start AsyncTask" />
<Button
android:id="@+id/stopasynctask"
android:layout_width="fill_parent"
android:layout_height="wrap_content"
android:text="Stop AsyncTask" />
<TextView
android:id="@+id/markingrunning"
android:layout_width="fill_parent"
android:layout_height="wrap_content"
/>
</LinearLayout>

java源代碼
package com.AndroidAsyncTask;

import android.app.Activity;
import android.os.AsyncTask;
import android.os.Bundle;
import android.os.SystemClock;
import android.view.View;
import android.widget.Button;
import android.widget.TextView;
import android.widget.Toast;

public class AndroidAsyncTask extends Activity {

Button buttonStartAsyncTask, buttonStopAsyncTask;
TextView tvRunningMark;
boolean bRunning;

/** Called when the activity is first created. */
@Override
public void onCreate(Bundle savedInstanceState) {
super.onCreate(savedInstanceState);
setContentView(R.layout.main);
buttonStartAsyncTask = (Button)findViewById(R.id.startasynctask);
buttonStopAsyncTask = (Button)findViewById(R.id.stopasynctask);
tvRunningMark = (TextView)findViewById(R.id.markingrunning);

buttonStartAsyncTask.setEnabled(true);
buttonStopAsyncTask.setEnabled(false);

buttonStartAsyncTask.setOnClickListener(new Button.OnClickListener(){

@Override
public void onClick(View v) {
// TODO Auto-generated method stub
bRunning = true;
new RunningAsyncTask().execute();


}});

buttonStopAsyncTask.setOnClickListener(new Button.OnClickListener(){

@Override
public void onClick(View v) {
// TODO Auto-generated method stub
bRunning = false;
}});

}

class RunningAsyncTask extends AsyncTask<Void, String, Void>{

private String strRunningMark;

private String rotateMarking(String marking){
if (marking=="-"){
return("\\");
}
else if (marking=="\\"){
return("|");
}
else if (marking=="|"){
return("/");
}
else{
return("-");

}
}

@Override
protected void onPostExecute(Void result) {
// TODO Auto-generated method stub
Toast.makeText(AndroidAsyncTask.this, "onPostExecute", Toast.LENGTH_LONG).show();
buttonStartAsyncTask.setEnabled(true);
buttonStopAsyncTask.setEnabled(false);
}

@Override
protected void onPreExecute() {
// TODO Auto-generated method stub
strRunningMark = "-";
Toast.makeText(AndroidAsyncTask.this, "onPreExecute", Toast.LENGTH_LONG).show();
buttonStartAsyncTask.setEnabled(false);
buttonStopAsyncTask.setEnabled(true);
}

@Override
protected void onProgressUpdate(String... values) {
// TODO Auto-generated method stub

//tvRunningMark.setText(strRunningMark);
tvRunningMark.setText(values[0]);
}

@Override
protected Void doInBackground(Void... params) {
// TODO Auto-generated method stub

while(bRunning){
strRunningMark = rotateMarking(strRunningMark);
publishProgress(strRunningMark);
SystemClock.sleep(100);
}
return null;
}

}
}


注意的是程序中, onPreExecute(), onPostExecute(Void result)和onProgressUpdate(String... values)都是運行在UI線程, 可以直接改變UI項目. 而doInBackground(Void... params)便在後台操作執行任務.

相關文章:
- Runnable
- 線程 (Thread)

2010年6月21日星期一

Adobe AIR for Android

Adobe AIR for Android 讓你發布ActionScript 3項目為Android應用程序(apk). 這些AIR應用程序可以通過Android應用程序商店, 如Android Market, 提供給 Android設備.

開發人員可以編寫新的代碼或重用現有的網絡內容, 以建立Android操作系統的AIR應用程序. 因為源代碼和資源在整個Flash運行平台, Adobe AIR與Flash Player中都可重複使用, 它也給開發者能更容易地針對其他移動和桌面環境.

注意: 因為AIR for Android仍處於測試版, 所以現在不能立即在Android Market出售你的應用程序, 要等待正式發布.
市場.


2010年6月15日星期二

檢視軟件版本, PackageInfo.versionCode 和 PackageInfo.versionName

許多時應用軟件都提供一個About Me選項, 從而檢視軟件版本.

檢視軟件版本

在Android可以使用下面程序代碼:
PackageInfo packageInfo = getPackageManager().getPackageInfo(getPackageName(), 0);
myVersionCode = packageInfo.versionCode;
myVersionName = packageInfo.versionName;

返回的數據是AndroidManifest.xml文件中定義的android:versionCode和android:versionName.

main.xml
<?xml version="1.0" encoding="utf-8"?>
<LinearLayout xmlns:android="http://schemas.android.com/apk/res/android"
android:orientation="vertical"
android:layout_width="fill_parent"
android:layout_height="fill_parent"
>
<TextView
android:layout_width="fill_parent"
android:layout_height="wrap_content"
android:text="@string/hello"
/>
<TextView
android:id="@+id/version"
android:layout_width="fill_parent"
android:layout_height="wrap_content"
/>
</LinearLayout>


AndroidCheckVersion.java
package com.AndroidCheckVersion;

import android.app.Activity;
import android.content.pm.PackageInfo;
import android.content.pm.PackageManager.NameNotFoundException;
import android.os.Bundle;
import android.widget.TextView;

public class AndroidCheckVersion extends Activity {
/** Called when the activity is first created. */
@Override
public void onCreate(Bundle savedInstanceState) {
super.onCreate(savedInstanceState);
setContentView(R.layout.main);

TextView version = (TextView)findViewById(R.id.version);

int myVersionCode;
String myVersionName;

try {
PackageInfo packageInfo = getPackageManager().getPackageInfo(getPackageName(), 0);
myVersionCode = packageInfo.versionCode;
myVersionName = packageInfo.versionName;
} catch (NameNotFoundException e) {
// TODO Auto-generated catch block
e.printStackTrace();
myVersionCode = 0; //dummy
myVersionName = ""; //dummy
}

String myVersion = (
"\n"
+ "Version Code: " + String.valueOf(myVersionCode) + "\n"
+ "Version Name: " + myVersionName + "\n");

version.setText(myVersion);
}
}


2010年6月14日星期一

Google I/O 2010 - A JIT Compiler for Android's Dalvik VM


概述一個適合嵌入式Android設備的JIT編譯器的設計. 主題包括架構概觀, 設計決策和JIT驗證, 測試和調整的意向.


2010年6月9日星期三

自動完成文本視圖(AutoCompleteTextView)

AutoCompleteTextView是EditText的一個子類, 是一個提供自動完成建議的文本視圖, 該建議的名單是顯示在一個下拉菜單, 用戶可以從中選擇一個項目以取代其內容.

自動完成文本視圖(AutoCompleteTextView)

main.xml
<?xml version="1.0" encoding="utf-8"?>
<LinearLayout xmlns:android="http://schemas.android.com/apk/res/android"
android:orientation="vertical"
android:layout_width="fill_parent"
android:layout_height="fill_parent"
>
<TextView
android:layout_width="fill_parent"
android:layout_height="wrap_content"
android:text="@string/hello"
/>
<AutoCompleteTextView android:id="@+id/myautocomplete"
android:layout_width="fill_parent"
android:layout_height="wrap_content"
android:completionThreshold="1"
/>
</LinearLayout>


AndroidAutoCompleteTextView.java
package com.AndroidAutoCompleteTextView;

import android.app.Activity;
import android.os.Bundle;
import android.text.Editable;
import android.text.TextWatcher;
import android.widget.ArrayAdapter;
import android.widget.AutoCompleteTextView;

public class AndroidAutoCompleteTextView extends Activity implements TextWatcher{

AutoCompleteTextView myAutoComplete;
String item[]={
"January", "February", "March", "April",
"May", "June", "July", "August",
"September", "October", "November", "December"
};

/** Called when the activity is first created. */
@Override
public void onCreate(Bundle savedInstanceState) {
super.onCreate(savedInstanceState);
setContentView(R.layout.main);

myAutoComplete = (AutoCompleteTextView)findViewById(R.id.myautocomplete);

myAutoComplete.addTextChangedListener(this);
myAutoComplete.setAdapter(new ArrayAdapter<String>(this, android.R.layout.simple_dropdown_item_1line, item));

}

@Override
public void afterTextChanged(Editable arg0) {
// TODO Auto-generated method stub

}

@Override
public void beforeTextChanged(CharSequence s, int start, int count,
int after) {
// TODO Auto-generated method stub

}

@Override
public void onTextChanged(CharSequence s, int start, int before, int count) {
// TODO Auto-generated method stub

}
}


2010年6月7日星期一

Runnable

前文線程(Thread)展示了如何通過擴展線程(extends Thread)實現一個新類並重寫其的run()方法來創建一個線程.

現在來看看創建線程的另一種方法: 實現一個線程類(Thread class)的對象, 並在實現時提供一個Runnable對象.

main.xml跟前文線程(Thread)的一樣.

AndroidThread.java
package com.AndroidThread;

import android.app.Activity;
import android.os.Bundle;
import android.os.Handler;
import android.os.Message;
import android.view.View;
import android.widget.Button;
import android.widget.TextView;
import android.widget.Toast;

public class AndroidThread extends Activity {

String strRunning = "-";
TextView tvMarkingrunning;
Button buttonNewThread, buttonStopRunning, buttonJoin, buttonGetState;

Thread myThread;
private boolean running = false;

Handler myHandler = new Handler(){

@Override
public void handleMessage(Message msg) {
// TODO Auto-generated method stub
strRunning = rotateMarking(strRunning);
tvMarkingrunning.setText("running: " + strRunning);
}
};

private String rotateMarking(String marking){
if (marking=="-"){
return("\\");
}
else if (marking=="\\"){
return("|");
}
else if (marking=="|"){
return("/");
}
else{
return("-");
}
}

private void setButtonsEnable(boolean enableNewThread,
boolean enableStopRunning,
boolean enableJoin){

buttonNewThread.setEnabled(enableNewThread);
buttonStopRunning.setEnabled(enableStopRunning);
buttonJoin.setEnabled(enableJoin);

}

/** Called when the activity is first created. */
@Override
public void onCreate(Bundle savedInstanceState) {
super.onCreate(savedInstanceState);
setContentView(R.layout.main);

tvMarkingrunning = (TextView)findViewById(R.id.markingrunning);
buttonNewThread = (Button)findViewById(R.id.newthread);
buttonStopRunning = (Button)findViewById(R.id.stoprunning);
buttonJoin = (Button)findViewById(R.id.join);
buttonGetState = (Button)findViewById(R.id.getstate);

buttonNewThread.setOnClickListener(buttonNewThreadOnClickListener);
buttonStopRunning.setOnClickListener(buttonStopRunningOnClickListener);
buttonJoin.setOnClickListener(buttonJoinOnClickListener);
buttonGetState.setOnClickListener(buttonGetStateOnClickListener);

setButtonsEnable(true, false, false);
}

private Button.OnClickListener buttonGetStateOnClickListener =
new Button.OnClickListener(){

@Override
public void onClick(View v) {
// TODO Auto-generated method stub
Toast.makeText(getBaseContext(), myThread.getState().toString(), Toast.LENGTH_LONG).show();
}
};

private Button.OnClickListener buttonNewThreadOnClickListener =
new Button.OnClickListener(){

@Override
public void onClick(View arg0) {
// TODO Auto-generated method stub

myThread = new Thread(new Runnable(){

public void run() {
// TODO Auto-generated method stub
while(running){
try {
Thread.sleep(500);
myHandler.sendMessage(myHandler.obtainMessage());
} catch (InterruptedException e) {
// TODO Auto-generated catch block
e.printStackTrace();
}
}
}
});

setRunning(true);
myThread.start();
Toast.makeText(getBaseContext(), myThread.getState().toString(), Toast.LENGTH_LONG).show();
setButtonsEnable(false, true, true);
}
};

private void setRunning(boolean b){
running = b;
}

private Button.OnClickListener buttonStopRunningOnClickListener =
new Button.OnClickListener(){

@Override
public void onClick(View arg0) {
// TODO Auto-generated method stub
setRunning(false);
Toast.makeText(getBaseContext(), myThread.getState().toString(), Toast.LENGTH_LONG).show();
setButtonsEnable(true, false, false);
}
};

private Button.OnClickListener buttonJoinOnClickListener =
new Button.OnClickListener(){

@Override
public void onClick(View arg0) {
// TODO Auto-generated method stub
boolean retry = true;
setRunning(false);
while(retry){
try {
myThread.join();
retry = false;
} catch (InterruptedException e) {
// TODO Auto-generated catch block
e.printStackTrace();
}
}
Toast.makeText(getBaseContext(), myThread.getState().toString(), Toast.LENGTH_LONG).show();
setButtonsEnable(true, false, false);

}
};
}

相關文章:
- 線程(Thread)
- 異步任務(AsyncTask)

2010年6月5日星期六

線程(Thread)

線程(Thread)是程序執行時的並行單位. 其中一個實現線程的途徑是擴展線程(extends Thread)實現一個新類並重寫其的run()方法. 這是一個使用線程的典型應用.

因為只有UI線程可以修改用戶界面, 因此我們必須通過消息(Message)和處理(Handler), 以顯示我們的線程狀態.

線程(Thread)

main.xml
<?xml version="1.0" encoding="utf-8"?>
<LinearLayout xmlns:android="http://schemas.android.com/apk/res/android"
android:orientation="vertical"
android:layout_width="fill_parent"
android:layout_height="fill_parent"
>
<TextView
android:layout_width="fill_parent"
android:layout_height="wrap_content"
android:text="@string/hello"
/>
<Button
android:id="@+id/newthread"
android:layout_width="fill_parent"
android:layout_height="wrap_content"
android:text="New a Thread" />
<Button
android:id="@+id/stoprunning"
android:layout_width="fill_parent"
android:layout_height="wrap_content"
android:text="Stop running" />
<Button
android:id="@+id/join"
android:layout_width="fill_parent"
android:layout_height="wrap_content"
android:text="join" />
<Button
android:id="@+id/getstate"
android:layout_width="fill_parent"
android:layout_height="wrap_content"
android:text="getState()" />
<TextView
android:id="@+id/markingrunning"
android:layout_width="fill_parent"
android:layout_height="wrap_content"
/>
</LinearLayout>


AndroidThread.java
package com.AndroidThread;

import android.app.Activity;
import android.os.Bundle;
import android.os.Handler;
import android.os.Message;
import android.view.View;
import android.widget.Button;
import android.widget.TextView;
import android.widget.Toast;

public class AndroidThread extends Activity {

String strRunning = "-";
TextView tvMarkingrunning;
Button buttonNewThread, buttonStopRunning, buttonJoin, buttonGetState;
MyThread myThread;

Handler myHandler = new Handler(){

@Override
public void handleMessage(Message msg) {
// TODO Auto-generated method stub
strRunning = rotateMarking(strRunning);
tvMarkingrunning.setText("running: " + strRunning);
}
};

public class MyThread extends Thread {

private boolean running = false;

public void setRunning(boolean b){
running = b;
}

@Override
public void run() {
// TODO Auto-generated method stub
while(running){
try {
Thread.sleep(500);
myHandler.sendMessage(myHandler.obtainMessage());
} catch (InterruptedException e) {
// TODO Auto-generated catch block
e.printStackTrace();
}
}
}
}

private String rotateMarking(String marking){
if (marking=="-"){
return("\\");
}
else if (marking=="\\"){
return("|");
}
else if (marking=="|"){
return("/");
}
else{
return("-");
}
}

private void setButtonsEnable(boolean enableNewThread,
boolean enableStopRunning,
boolean enableJoin){

buttonNewThread.setEnabled(enableNewThread);
buttonStopRunning.setEnabled(enableStopRunning);
buttonJoin.setEnabled(enableJoin);

}

/** Called when the activity is first created. */
@Override
public void onCreate(Bundle savedInstanceState) {
super.onCreate(savedInstanceState);
setContentView(R.layout.main);

tvMarkingrunning = (TextView)findViewById(R.id.markingrunning);
buttonNewThread = (Button)findViewById(R.id.newthread);
buttonStopRunning = (Button)findViewById(R.id.stoprunning);
buttonJoin = (Button)findViewById(R.id.join);
buttonGetState = (Button)findViewById(R.id.getstate);

buttonNewThread.setOnClickListener(buttonNewThreadOnClickListener);
buttonStopRunning.setOnClickListener(buttonStopRunningOnClickListener);
buttonJoin.setOnClickListener(buttonJoinOnClickListener);
buttonGetState.setOnClickListener(buttonGetStateOnClickListener);

setButtonsEnable(true, false, false);

}

private Button.OnClickListener buttonGetStateOnClickListener =
new Button.OnClickListener(){

@Override
public void onClick(View v) {
// TODO Auto-generated method stub
Toast.makeText(getBaseContext(), myThread.getState().toString(), Toast.LENGTH_LONG).show();
}

};

private Button.OnClickListener buttonNewThreadOnClickListener =
new Button.OnClickListener(){

@Override
public void onClick(View arg0) {
// TODO Auto-generated method stub
myThread = new MyThread();
myThread.setRunning(true);
myThread.start();
Toast.makeText(getBaseContext(), myThread.getState().toString(), Toast.LENGTH_LONG).show();
setButtonsEnable(false, true, true);

}
};

private Button.OnClickListener buttonStopRunningOnClickListener =
new Button.OnClickListener(){

@Override
public void onClick(View arg0) {
// TODO Auto-generated method stub
myThread.setRunning(false);
Toast.makeText(getBaseContext(), myThread.getState().toString(), Toast.LENGTH_LONG).show();
setButtonsEnable(true, false, false);
}
};

private Button.OnClickListener buttonJoinOnClickListener =
new Button.OnClickListener(){

@Override
public void onClick(View arg0) {
// TODO Auto-generated method stub
boolean retry = true;
myThread.setRunning(false);
while(retry){
try {
myThread.join();
retry = false;
} catch (InterruptedException e) {
// TODO Auto-generated catch block
e.printStackTrace();
}
}
Toast.makeText(getBaseContext(), myThread.getState().toString(), Toast.LENGTH_LONG).show();
setButtonsEnable(true, false, false);

}
};
}


相關文章:
- Runnable
- 異步任務(AsyncTask)

2010年6月2日星期三

設置按鈕的文本和背景顏色

通過XML, 可以使用以下的語句:
android:background="#f00000"
android:textColor="#000000"

在運行時可以使用程序代碼:
myIconButton.setBackgroundColor(0xff505050);
myIconButton.setTextColor(0xffffffff);

設置按鈕的文本和背景顏色
設置按鈕的文本和背景顏色

main.xml
<?xml version="1.0" encoding="utf-8"?>
<LinearLayout xmlns:android="http://schemas.android.com/apk/res/android"
android:orientation="vertical"
android:layout_width="fill_parent"
android:layout_height="fill_parent"
>
<TextView
android:layout_width="fill_parent"
android:layout_height="wrap_content"
android:text="@string/hello"
/>
<Button android:id="@+id/myIconButton"
android:drawableLeft="@drawable/icon"
android:background="#f00000"
android:textColor="#000000"
android:text="My Icon Button"
android:layout_gravity="center_horizontal"
android:layout_width="wrap_content"
android:layout_height="wrap_content">
</Button>
</LinearLayout>


JAVA
package com.AndroidIconButton;

import android.app.Activity;
import android.os.Bundle;
import android.view.View;
import android.widget.Button;

public class AndroidIconButton extends Activity {
/** Called when the activity is first created. */
@Override
public void onCreate(Bundle savedInstanceState) {
super.onCreate(savedInstanceState);
setContentView(R.layout.main);

final Button myIconButton = (Button)findViewById(R.id.myIconButton);
myIconButton.setOnClickListener(new Button.OnClickListener(){

@Override
public void onClick(View v) {
// TODO Auto-generated method stub
myIconButton.setBackgroundColor(0xff505050);
myIconButton.setTextColor(0xffffffff);

}});
}
}


使用XML定義為按鈕(Button)添加圖像

只需要增加"android:drawableTop", "android:drawableBottom", "android:drawableLeft"或"android:drawableRight"便可以.
例子: android:drawableLeft="@drawable/icon"

為按鈕(Button)添加圖像

<Button android:id="@+id/myIconButton"
android:drawableLeft="@drawable/icon"
android:text="My Icon Button"
android:layout_gravity="center_horizontal"
android:layout_width="wrap_content"
android:layout_height="wrap_content">
</Button>