2010年1月30日星期六

動態的進度條(ProgressBar)

在進度條(ProgressBar)一篇文章中, 顯示了靜態的進度條. 現在來實現一個動態的進度條.

動態的進度條(ProgressBar)

我們實施了一個可運行的線程(Runable Thread), 來產生信息(Message); (我們不能在此線程直接更新進度條, 因為祗有創建該UI的線程能夠變更該UI)

另一方面我們實施了一個Handle來處理信息, 以更新進度條.

修改main.xml
<?xml version="1.0" encoding="utf-8"?>
<LinearLayout xmlns:android="http://schemas.android.com/apk/res/android"
android:orientation="vertical"
android:layout_width="fill_parent"
android:layout_height="fill_parent"
>
<TextView
android:layout_width="fill_parent"
android:layout_height="wrap_content"
android:text="@string/hello"
/>
<ProgressBar
android:id="@+id/progressbar"
android:layout_width="fill_parent"
android:layout_height="wrap_content"
style="?android:attr/progressBarStyleHorizontal"
android:max="100"
/>
</LinearLayout>


主程序
package com.AndroidProgressBar;

import android.app.Activity;
import android.os.Bundle;
import android.os.Handler;
import android.os.Message;
import android.widget.ProgressBar;

public class AndroidProgressBar extends Activity {

ProgressBar myProgressBar;
int myProgress = 0;


/** Called when the activity is first created. */
@Override
public void onCreate(Bundle savedInstanceState) {
super.onCreate(savedInstanceState);
setContentView(R.layout.main);

myProgressBar = (ProgressBar)findViewById(R.id.progressbar);
myProgressBar.setProgress(myProgress);

new Thread(new Runnable(){

@Override
public void run() {
// TODO Auto-generated method stub
while(myProgress<100){
try{
myHandle.sendMessage(myHandle.obtainMessage());
Thread.sleep(1000);
}catch(Throwable t){
}
}
}
}).start();

}

Handler myHandle = new Handler(){

@Override
public void handleMessage(Message msg) {
// TODO Auto-generated method stub
myProgress++;
myProgressBar.setProgress(myProgress);
}
};
}


2010年1月28日星期四

進度條(ProgressBar)

進度條(ProgressBar)

進度條(ProgressBar)是一種顯示進度的視覺指示器, 最基本的有兩種: 圓形和條形.

圓形:
<ProgressBar
android:id="@+id/progressbar"
android:layout_width="wrap_content"
android:layout_height="wrap_content"
/>


條形:
<ProgressBar
android:id="@+id/progressbar"
android:layout_width="fill_parent"
android:layout_height="wrap_content"
style="?android:attr/progressBarStyleHorizontal"
android:max="100"
android:progress="70"
/>


相關文章: 動態的進度條(ProgressBar)


2010年1月27日星期三

Android@维基百科

Android是基于Linux内核[2]的软件平台和操作系统,是Google在2007年11月5日公布的行動電話系統平台,早期由Google开发,后由开放手机联盟中文維基百科未有开放手机联盟頁面,可參考英语维基百科的对应页面Open Handset Alliance。(Open Handset Alliance)开发。它採用了軟件堆層(software stack,又名以軟件疊層)的架構,主要分為三部分。低層以Linux核心工作为基础,只提供基本功能;其他的應用軟件則由各公司自行開發,以Java作為編寫程式的一部分。另外,为了推广此技术,Google和其它几十个手机公司建立了开放手机联盟。Android在未公开之前常被傳聞为Google电话或gPhone。大多传闻认为Google開發的是自己的手機電話产品,而不是一套软件平台。到了2010年1月,Google始發表自家品牌手機電話的Nexus One。

來源: Android - 维基百科,自由的百科全书

2010年1月24日星期日

Android開發人員實驗室世界巡迴之旅

Android團隊正展開"Android開發人員實驗室世界巡迴之旅", 將到訪包括歐洲,北美洲和亞洲等城市.

在每一站,Android團隊將發表Android平台的最新情況,包括最新的Android硬件。這是一個很好的機會,以滿足志同道合的Android應用開發人員,實際使用最新的Android裝置,測試應用程序,並向Android團隊成員詢問任何問題。

可瀏覽Android Developer Lab的網站以了解更多有關詳情。

Android Developers Blog: Android Developer Labs World Tour

2010年1月22日星期五

滾動視圖(ScrollView)

滾動視圖(ScrollView)是一個可以滾動的佈局容器, 允許它大於物理顯示. 滾動視圖(ScrollView)是一個框佈局(FrameLayout), 這意味著你應該將一個包含全部滾動內容的子項放進去. 該子項本身可以是一個帶有複雜對象的佈局管理器(layout manager).


例如:
<?xml version="1.0" encoding="utf-8"?>
<LinearLayout xmlns:android="http://schemas.android.com/apk/res/android"
android:orientation="vertical"
android:layout_width="fill_parent"
android:layout_height="fill_parent"
>
<TextView
android:layout_width="fill_parent"
android:layout_height="wrap_content"
android:text="@string/hello"
/>
<ScrollView
android:layout_height="200px"
android:layout_width="fill_parent"
>
<LinearLayout
android:orientation="vertical"
android:layout_width="fill_parent"
android:layout_height="fill_parent"
>
<TextView
android:layout_width="fill_parent"
android:layout_height="wrap_content"
android:textSize="15sp"
android:text="
Class Overview\n\n
Layout container for a view hierarchy that can be scrolled by the user, allowing it to be larger than the physical display. A ScrollView is a FrameLayout, meaning you should place one child in it containing the entire contents to scroll; this child may itself be a layout manager with a complex hierarchy of objects. A child that is often used is a LinearLayout in a vertical orientation, presenting a vertical array of top-level items that the user can scroll through.\n\n
The TextView class also takes care of its own scrolling, so does not require a ScrollView, but using the two together is possible to achieve the effect of a text view within a larger container.\n\n
ScrollView only supports vertical scrolling.\n"
/>
<Button
android:layout_width="wrap_content"
android:layout_height="wrap_content"
android:text="Button Inside ScrollView"
/>
</LinearLayout>
</ScrollView>
<Button
android:layout_width="wrap_content"
android:layout_height="wrap_content"
android:text="Button Outside ScrollView"
/>
</LinearLayout>


相關文章: 水平滾動視圖(HorizontalScrollView)


2010年1月17日星期日

android.R.drawable

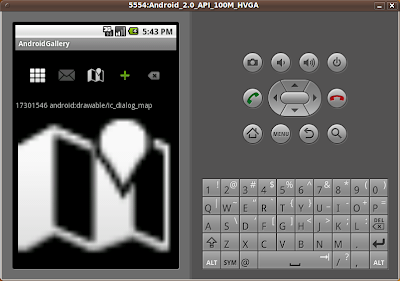
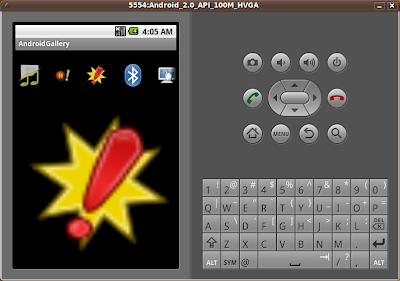
Android提供一些自帶的drawable資源, 由17301504至17301655; 可以通過android.R.drawable存取.

這篇文章修改上一個練習"畫廊(Gallery), 及有一點動畫效果的圖像切換器(ImageSwitcher)", 演示Android的drawable資源.

android.R.drawable

修改main.xml添加一個TextView, 顯示drawable資源的ID.
<?xml version="1.0" encoding="utf-8"?>
<LinearLayout xmlns:android="http://schemas.android.com/apk/res/android"
android:orientation="vertical"
android:layout_width="fill_parent"
android:layout_height="fill_parent"
>
<Gallery
android:id="@+id/gallery"
android:layout_width="fill_parent"
android:layout_height="100dp"
android:spacing="10dp"
/>
<TextView
android:layout_width="fill_parent"
android:layout_height="wrap_content"
android:id="@+id/resourceid"
/>
<ImageSwitcher
android:id="@+id/imageswitcher"
android:layout_width="fill_parent"
android:layout_height="fill_parent"
/>
</LinearLayout>


修改主程序, 主要在ImageAdapter的構造方法, 和OnItemSelectedListener的onItemSelected方法:
package com.AndroidGallery;

import android.app.Activity;
import android.content.Context;
import android.content.res.Resources;
import android.os.Bundle;
import android.view.View;
import android.view.ViewGroup;
import android.view.ViewGroup.LayoutParams;
import android.view.animation.AnimationUtils;
import android.widget.BaseAdapter;
import android.widget.Gallery;
import android.widget.ImageSwitcher;
import android.widget.ImageView;
import android.widget.AdapterView;
import android.widget.TextView;
import android.widget.AdapterView.OnItemSelectedListener;
import android.widget.ViewSwitcher.ViewFactory;


public class AndroidGallery extends Activity implements ViewFactory{

final int resourceStart = 17301504;
final int resourceEnd = 17301655;
final int ResourceLength = resourceEnd - resourceStart + 1;

private ImageSwitcher myImageSwitcher;
private TextView resourceID;

/** Called when the activity is first created. */
@Override
public void onCreate(Bundle savedInstanceState) {
super.onCreate(savedInstanceState);
setContentView(R.layout.main);

resourceID = (TextView)findViewById(R.id.resourceid);

myImageSwitcher = (ImageSwitcher)findViewById(R.id.imageswitcher);
myImageSwitcher.setFactory(this);
myImageSwitcher.setInAnimation(AnimationUtils.loadAnimation(this, android.R.anim.fade_in));
myImageSwitcher.setOutAnimation(AnimationUtils.loadAnimation(this, android.R.anim.fade_out));

Gallery myGallery = (Gallery)findViewById(R.id.gallery);
myGallery.setAdapter(new ImageAdapter(this));
myGallery.setOnItemSelectedListener(myGalleryOnItemSelectedListener);
}

private OnItemSelectedListener myGalleryOnItemSelectedListener
= new OnItemSelectedListener(){

@Override
public void onItemSelected(AdapterView<?> arg0, View arg1,
int arg2, long arg3) {
// TODO Auto-generated method stub
myImageSwitcher.setImageResource(mThumbIds[arg2]);

String strResource =
arg0.getAdapter().getItem(arg2).toString() +
" " +
Resources.getSystem().getResourceName(arg2+resourceStart);
resourceID.setText(strResource);
}

@Override
public void onNothingSelected(AdapterView<?> arg0) {
// TODO Auto-generated method stub

}

};

private int[] mThumbIds = new int[ResourceLength];

public class ImageAdapter extends BaseAdapter{
private Context context;

public ImageAdapter(Context c){
context = c;
for ( int i = 0; i < ResourceLength; i++)
{
mThumbIds[i] = i + resourceStart;
}
}

@Override
public int getCount() {
// TODO Auto-generated method stub
return mThumbIds.length;
}

@Override
public Object getItem(int position) {
// TODO Auto-generated method stub
return mThumbIds[position];
}

@Override
public long getItemId(int position) {
// TODO Auto-generated method stub
return position;
}

@Override
public View getView(int position, View convertView, ViewGroup parent) {
// TODO Auto-generated method stub
ImageView imageView;
if (convertView == null) {
// if it's not recycled, initialize some attributes
imageView = new ImageView(context);
imageView.setLayoutParams(new Gallery.LayoutParams(LayoutParams.WRAP_CONTENT, LayoutParams.WRAP_CONTENT));
imageView.setScaleType(ImageView.ScaleType.CENTER_CROP);
imageView.setPadding(8, 8, 8, 8);
} else {
imageView = (ImageView) convertView;
}
imageView.setImageResource(mThumbIds[position]);
return imageView;
}
}

@Override
public View makeView() {
// TODO Auto-generated method stub
ImageView i = new ImageView(this);
i.setScaleType(ImageView.ScaleType.FIT_CENTER);
i.setLayoutParams(new ImageSwitcher.LayoutParams(LayoutParams.FILL_PARENT, LayoutParams.FILL_PARENT));
return i;
}
}


2010年1月14日星期四

如何在Eclipse上升級Android SDK

如果你已經安裝了Android 1.6 SDK或更高版本, 可以使用Android SDK and AVD Manager升級Android SDK, 不需要重新安裝.

步驟如下:

- 啟動Eclipse

- 點擊Window, 選擇Android SDK and AVD Manager.

- 左邊選擇Available Packages, 右邊你可以看到可供下載並安裝的選項, 包括SDK Platfoem Android 2.1, API 7, revision 1, Google APIs by Google Inc., Android API 7, revision 1, 和相關文件. 點擊選擇全部, 然後點擊Install Selected.


- 點擇Accept All, 再點擊Install Accepted.


- 完成後, 重新啟動.

- 你可能會需要更新ADT(Android Development Tools), 方法是在Eclipse菜單點擊 Help -> Check for Updates.

記住, 在使用新的Android模擬器以前, 需要先創建新的Android Virtual Devices(AVDs).

Android Developers公佈Android 2.1 SDK

Android Developers Blog: Android 2.1 SDK

隨著Google nexus One的推出, Android Developers亦公佈相應的Android 2.1 SDK.

安裝程序可以參考另一篇文章"在Linux(ubuntu)上安裝Eclipse + Android SDK"

如果你已經安裝了Android 1.6 SDK或更高版本, 可以使用Android SDK and AVD Manager升級Android SDK, 不需要重新安裝.

2010年1月11日星期一

畫廊(Gallery), 及有一點動畫效果的圖像切換器(ImageSwitcher)

延續先前的另一篇文章"畫廊(Gallery), 實現OnItemSelectedListener把圖形顯示在圖像視圖(ImageView)上"; 文章中使用ImageView把圖像顯示. 今次使用圖像切換器(ImageSwitcher), 它繼承自視圖切換器(ViewSwitcher), 在兩個圖像之間切換, 它有一個創建視圖的工廠類(Factory).

ImageSwitcher

如果你只看上面的屏幕圖像, 可能是看不出差別; 祗要真的運行應用程序, 可以發現圖像與圖像之間的切換是有淡入(fade-in)/淡出(fade-out)的動畫效果.

修改main.xml, 把ImageView改為ImageSwitcher.
<?xml version="1.0" encoding="utf-8"?>
<LinearLayout xmlns:android="http://schemas.android.com/apk/res/android"
android:orientation="vertical"
android:layout_width="fill_parent"
android:layout_height="fill_parent"
>
<Gallery
android:id="@+id/gallery"
android:layout_width="fill_parent"
android:layout_height="100dp"
android:spacing="10dp"
/>
<ImageSwitcher
android:id="@+id/imageswitcher"
android:layout_width="fill_parent"
android:layout_height="fill_parent"
/>
</LinearLayout>


使用圖像切換器(ImageSwitcher), 需要實現ViewFactory, 並重寫makeView()方法, 而淡入(fade-in)/淡出(fade-out)的動畫效果就由ImageSwitcher.setInAnimation()及ImageSwitcher.setInAnimation()設定.
package com.AndroidGallery;

import android.app.Activity;
import android.content.Context;
import android.os.Bundle;
import android.view.View;
import android.view.ViewGroup;
import android.view.ViewGroup.LayoutParams;
import android.view.animation.AnimationUtils;
import android.widget.BaseAdapter;
import android.widget.Gallery;
import android.widget.ImageSwitcher;
import android.widget.ImageView;
import android.widget.AdapterView;
import android.widget.AdapterView.OnItemSelectedListener;
import android.widget.ViewSwitcher.ViewFactory;


public class AndroidGallery extends Activity implements ViewFactory{

private ImageSwitcher myImageSwitcher;

/** Called when the activity is first created. */
@Override
public void onCreate(Bundle savedInstanceState) {
super.onCreate(savedInstanceState);
setContentView(R.layout.main);

myImageSwitcher = (ImageSwitcher)findViewById(R.id.imageswitcher);
myImageSwitcher.setFactory(this);
myImageSwitcher.setInAnimation(AnimationUtils.loadAnimation(this, android.R.anim.fade_in));
myImageSwitcher.setOutAnimation(AnimationUtils.loadAnimation(this, android.R.anim.fade_out));

Gallery myGallery = (Gallery)findViewById(R.id.gallery);
myGallery.setAdapter(new ImageAdapter(this));
myGallery.setOnItemSelectedListener(myGalleryOnItemSelectedListener);
}

private OnItemSelectedListener myGalleryOnItemSelectedListener
= new OnItemSelectedListener(){

@Override
public void onItemSelected(AdapterView<?> arg0, View arg1,
int arg2, long arg3) {
// TODO Auto-generated method stub
myImageSwitcher.setImageResource(mThumbIds[arg2]);
}

@Override
public void onNothingSelected(AdapterView<?> arg0) {
// TODO Auto-generated method stub

}

};

private Integer[] mThumbIds = {
R.drawable.a01,
R.drawable.a02,
R.drawable.a03,
R.drawable.a04,
R.drawable.a05,
R.drawable.a06,
R.drawable.a07,
R.drawable.a08,
R.drawable.a09,
R.drawable.a10,
R.drawable.a11,
R.drawable.a12,
R.drawable.a13,
R.drawable.a14,
R.drawable.a15,
};

public class ImageAdapter extends BaseAdapter{
private Context context;

public ImageAdapter(Context c){
context = c;
}

@Override
public int getCount() {
// TODO Auto-generated method stub
return mThumbIds.length;
}

@Override
public Object getItem(int position) {
// TODO Auto-generated method stub
return mThumbIds[position];
}

@Override
public long getItemId(int position) {
// TODO Auto-generated method stub
return position;
}

@Override
public View getView(int position, View convertView, ViewGroup parent) {
// TODO Auto-generated method stub
ImageView imageView;
if (convertView == null) {
// if it's not recycled, initialize some attributes
imageView = new ImageView(context);
imageView.setLayoutParams(new Gallery.LayoutParams(LayoutParams.WRAP_CONTENT, LayoutParams.WRAP_CONTENT));
imageView.setScaleType(ImageView.ScaleType.CENTER_CROP);
imageView.setPadding(8, 8, 8, 8);
} else {
imageView = (ImageView) convertView;
}

imageView.setImageResource(mThumbIds[position]);
return imageView;
}
}

@Override
public View makeView() {
// TODO Auto-generated method stub
ImageView i = new ImageView(this);
i.setScaleType(ImageView.ScaleType.FIT_CENTER);
i.setLayoutParams(new ImageSwitcher.LayoutParams(LayoutParams.FILL_PARENT, LayoutParams.FILL_PARENT));
return i;
}
}


為網絡視圖(WebView)補充一點導航的功能

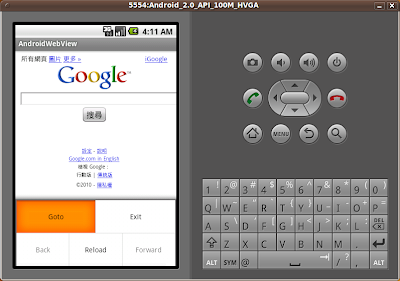
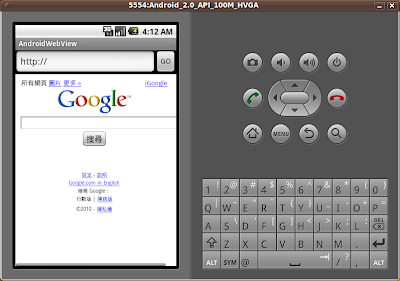
上一篇"一個簡單的瀏覽器, 網絡視圖(WebView)"實在太簡單了, 現在為它補充一點導航的功能; 包括輸入網址, 前進,後退,重載, 當然還有退出.


Android WebView
Android WebView

按MENU按鈕可以調用菜單, 包括Goto, Forward,Back,Reload, Exit五個選項.

Goto(輸入網址): 屏幕上方會出現一個EditText和一個Button, 以輸入網址. 這是通過setVisibility()的方法做到需要時才顯示, 不需要時不顯示的效果. 按下GO按鈕, 應用程序會調用WebView.loadUrl()加載網址.

Exit(退出): 就是退出.

Forward(前進)/Back(後退): 在onPrepareOptionsMenu()中根據WebView.canGoForward()和WebView.CanGoBack()決定按鈕有沒有效, 再通過setEnabled()設定. 當被選擇時調用WebView.goForward()或WebView.goBack()實現.

Reload(重載): 調用WebView.loadUrl()重載網址.

首先,創建一個新/res/menu/的menu.xml文件
(可參考"使用XML定義Options Menu(選項菜單)")
<?xml version="1.0" encoding="UTF-8"?>
<menu xmlns:android="http://schemas.android.com/apk/res/android">
<item android:id="@+id/gotourl"
android:title="Goto" />
<item android:id="@+id/exit"
android:title="Exit" />
<item android:id="@+id/goback"
android:title="Back" />
<item android:id="@+id/reload"
android:title="Reload" />
<item android:id="@+id/goforward"
android:title="Forward" />
</menu>


修改main.xml
<?xml version="1.0" encoding="utf-8"?>
<LinearLayout xmlns:android="http://schemas.android.com/apk/res/android"
android:orientation="vertical"
android:layout_width="fill_parent"
android:layout_height="fill_parent"
>
<RelativeLayout
android:id="@+id/UrlEntry"
android:orientation="horizontal"
android:layout_width="fill_parent"
android:layout_height="wrap_content"
android:shrinkColumns="0"
android:visibility="gone"
>
<Button
android:layout_width="wrap_content"
android:layout_height="wrap_content"
android:layout_alignParentRight="true"
android:id="@+id/go"
android:text="GO"
/>
<EditText
android:layout_width="fill_parent"
android:layout_height="wrap_content"
android:layout_toLeftOf="@id/go"
android:id="@+id/url"
android:text="http://"
/>

</RelativeLayout>
<WebView android:id="@+id/mybrowser"
android:layout_width="fill_parent"
android:layout_height="fill_parent"
/>
</LinearLayout>


修改源碼
package com.AndroidWebView;

import android.app.Activity;
import android.app.AlertDialog;
import android.content.DialogInterface;
import android.os.Bundle;
import android.view.Menu;
import android.view.MenuInflater;
import android.view.MenuItem;
import android.view.View;
import android.webkit.WebSettings;
import android.webkit.WebView;
import android.webkit.WebViewClient;
import android.widget.Button;
import android.widget.EditText;
import android.widget.RelativeLayout;

public class AndroidWebView extends Activity {

WebView myBrowser;
RelativeLayout myUrlEntry;
EditText myUrl;
Button myGoButton;

/** Called when the activity is first created. */
@Override
public void onCreate(Bundle savedInstanceState) {
super.onCreate(savedInstanceState);

setContentView(R.layout.main);

String myURL = "http://www.google.com/m/";
myBrowser=(WebView)findViewById(R.id.mybrowser);
myUrlEntry = (RelativeLayout)findViewById(R.id.UrlEntry);
myUrl = (EditText)findViewById(R.id.url);
myGoButton = (Button)findViewById(R.id.go);
myGoButton.setOnClickListener(myGoButtonOnClickListener);

WebSettings websettings = myBrowser.getSettings();
websettings.setSupportZoom(true);
websettings.setBuiltInZoomControls(true);
websettings.setJavaScriptEnabled(true);

myBrowser.setWebViewClient(new WebViewClient());

myBrowser.loadUrl(myURL);

}

private Button.OnClickListener myGoButtonOnClickListener = new Button.OnClickListener(){

@Override
public void onClick(View arg0) {
// TODO Auto-generated method stub
myBrowser.loadUrl(myUrl.getText().toString());
myUrlEntry.setVisibility(View.GONE);
}

};

@Override
public boolean onCreateOptionsMenu(Menu menu) {
// TODO Auto-generated method stub
MenuInflater menuInflater = getMenuInflater();
menuInflater.inflate(R.menu.menu, menu);
return true;
}

@Override
public boolean onPrepareOptionsMenu(Menu menu) {
// TODO Auto-generated method stub
if(myBrowser.canGoForward())
menu.findItem(R.id.goforward).setEnabled(true);
else
menu.findItem(R.id.goforward).setEnabled(false);

if(myBrowser.canGoBack())
menu.findItem(R.id.goback).setEnabled(true);
else
menu.findItem(R.id.goback).setEnabled(false);

myUrlEntry.setVisibility(View.GONE);

return true;
}

@Override
public boolean onOptionsItemSelected(MenuItem item) {
// TODO Auto-generated method stub
switch(item.getItemId()){
case (R.id.exit):
openExitDialog();
break;
case (R.id.gotourl):
myUrlEntry.setVisibility(View.VISIBLE);
break;
case (R.id.goback):
myBrowser.goBack();
break;
case (R.id.reload):
myBrowser.reload();
break;
case (R.id.goforward):
myBrowser.goForward();
break;
}
return true;
}

private void openExitDialog()
{
new AlertDialog.Builder(this)
.setTitle("Exit")
.setMessage("Exit the Browser?" )
.setNegativeButton("NO",
new DialogInterface.OnClickListener(){
public void onClick(DialogInterface dialoginterface, int i)
{}
})
.setPositiveButton("YES",
new DialogInterface.OnClickListener()
{
public void onClick(DialogInterface dialoginterface, int i)
{ finish();
}
})
.show();
}

}


注意: 需參考上一篇"一個簡單的瀏覽器, 網絡視圖(WebView)", 修改清單文件(AndroidManifest.xml).


一個簡單的瀏覽器, 網絡視圖(WebView).

網絡視圖(WebView)是一個顯示網頁的視圖(View). 通過使用網絡視圖(WebView), 您可以把網絡瀏覽器顯示在您的活動(Activity)上.

Android Browser using WebView

注意,為了使您的活動(Activity)接入互聯網並從網絡視圖(WebView)加載網頁, 您必須在清單文件(AndroidManifest.xml)裡, 的子項中添加"android.permission.INTERNET"這個權限.

<?xml version="1.0" encoding="utf-8"?>
<manifest xmlns:android="http://schemas.android.com/apk/res/android"
package="com.AndroidWebView"
android:versionCode="1"
android:versionName="1.0">
<application android:icon="@drawable/icon" android:label="@string/app_name">
<activity android:name=".AndroidWebView"
android:label="@string/app_name">
<intent-filter>
<action android:name="android.intent.action.MAIN" />
<category android:name="android.intent.category.LAUNCHER" />
</intent-filter>
</activity>

</application>
<uses-sdk android:minSdkVersion="5" />
<uses-permission android:name="android.permission.INTERNET" />
</manifest>


修改main.xml, 添加一個WebView.
<?xml version="1.0" encoding="utf-8"?>
<LinearLayout xmlns:android="http://schemas.android.com/apk/res/android"
android:orientation="vertical"
android:layout_width="fill_parent"
android:layout_height="fill_parent"
>
<WebView android:id="@+id/mybrowser"
android:layout_width="fill_parent"
android:layout_height="fill_parent"
/>
</LinearLayout>


修改源碼
package com.AndroidWebView;

import android.app.Activity;
import android.os.Bundle;
import android.webkit.WebSettings;
import android.webkit.WebView;
import android.webkit.WebViewClient;

public class AndroidWebView extends Activity {
/** Called when the activity is first created. */
@Override
public void onCreate(Bundle savedInstanceState) {
super.onCreate(savedInstanceState);

setContentView(R.layout.main);

String myURL = "http://www.google.com/m/";
WebView myBrowser=(WebView)findViewById(R.id.mybrowser);

WebSettings websettings = myBrowser.getSettings();
websettings.setSupportZoom(true);
websettings.setBuiltInZoomControls(true);
websettings.setJavaScriptEnabled(true);

myBrowser.setWebViewClient(new WebViewClient());

myBrowser.loadUrl(myURL);

}
}


默認的設置是限制JavaScript, 所以需要使用此代碼啟用JavaScript:
websettings.setJavaScriptEnabled(true);

下面兩句代碼非常明顯, 啟用內置的縮放功能. 當網頁滾動時, 內置的縮放功能(+/-符號)便會出現.
websettings.setSupportZoom(true);
websettings.setBuiltInZoomControls(true);

在默認設定之下, 如果你點擊一個鏈接, 它會調用Android自帶的瀏覽器打開鏈接. 如果你想繼續使用你自己的瀏覽器, 可以使用下面的代碼.
myBrowser.setWebViewClient(new WebViewClient());


下一篇: "為網絡視圖(WebView)補充一點導航的功能"


2010年1月10日星期日

畫廊(Gallery), 實現OnItemSelectedListener把圖形顯示在圖像視圖(ImageView)上

延續上一篇文章畫廊(Gallery), 這次練習實現OnItemSelectedListener, 把正被選擇的圖形(即正中間那一個)顯示在佈局內的另一個圖像視圖(ImageView)上.

Gallery with ImageView

先創建一個文件夾/res/drawable, 並複製一些PNG圖形到/res/drawable內. 我使用的文件名為a01.png~a15.png.

修改main.xml, 在Gallery外多加一個圖像視圖(ImageView).
<?xml version="1.0" encoding="utf-8"?>
<LinearLayout xmlns:android="http://schemas.android.com/apk/res/android"
android:orientation="vertical"
android:layout_width="fill_parent"
android:layout_height="fill_parent"
>
<Gallery
android:id="@+id/gallery"
android:layout_width="fill_parent"
android:layout_height="100dp"
android:spacing="10dp"
/>
<ImageView
android:id="@+id/imageview"
android:layout_width="fill_parent"
android:layout_height="fill_parent"
/>
</LinearLayout>


修改源碼.

package com.AndroidGallery;

import android.app.Activity;
import android.content.Context;
import android.os.Bundle;
import android.view.View;
import android.view.ViewGroup;
import android.view.ViewGroup.LayoutParams;
import android.widget.BaseAdapter;
import android.widget.Gallery;
import android.widget.ImageView;
import android.widget.AdapterView;
import android.widget.AdapterView.OnItemSelectedListener;


public class AndroidGallery extends Activity{

private ImageView myImageView;

/** Called when the activity is first created. */
@Override
public void onCreate(Bundle savedInstanceState) {
super.onCreate(savedInstanceState);
setContentView(R.layout.main);

myImageView = (ImageView)findViewById(R.id.imageview);

Gallery myGallery = (Gallery)findViewById(R.id.gallery);
myGallery.setAdapter(new ImageAdapter(this));
myGallery.setOnItemSelectedListener(myGalleryOnItemSelectedListener);

}

private OnItemSelectedListener myGalleryOnItemSelectedListener
= new OnItemSelectedListener(){

@Override
public void onItemSelected(AdapterView<?> arg0, View arg1,
int arg2, long arg3) {
// TODO Auto-generated method stub
myImageView.setImageResource(mThumbIds[arg2]);
}

@Override
public void onNothingSelected(AdapterView<?> arg0) {
// TODO Auto-generated method stub

}

};

private Integer[] mThumbIds = {
R.drawable.a01,
R.drawable.a02,
R.drawable.a03,
R.drawable.a04,
R.drawable.a05,
R.drawable.a06,
R.drawable.a07,
R.drawable.a08,
R.drawable.a09,
R.drawable.a10,
R.drawable.a11,
R.drawable.a12,
R.drawable.a13,
R.drawable.a14,
R.drawable.a15,
};

public class ImageAdapter extends BaseAdapter{
private Context context;

public ImageAdapter(Context c){
context = c;
}

@Override
public int getCount() {
// TODO Auto-generated method stub
return mThumbIds.length;
}

@Override
public Object getItem(int position) {
// TODO Auto-generated method stub
return mThumbIds[position];
}

@Override
public long getItemId(int position) {
// TODO Auto-generated method stub
return position;
}

@Override
public View getView(int position, View convertView, ViewGroup parent) {
// TODO Auto-generated method stub
ImageView imageView;
if (convertView == null) {
// if it's not recycled, initialize some attributes
imageView = new ImageView(context);
imageView.setLayoutParams(new Gallery.LayoutParams(LayoutParams.WRAP_CONTENT, LayoutParams.WRAP_CONTENT));
imageView.setScaleType(ImageView.ScaleType.CENTER_CROP);
imageView.setPadding(8, 8, 8, 8);
} else {
imageView = (ImageView) convertView;
}

imageView.setImageResource(mThumbIds[position]);
return imageView;
}
}
}


參考另一篇: "畫廊(Gallery), 及有一點動畫效果的圖像切換器(ImageSwitcher)"


2010年1月8日星期五

畫廊(Gallery)

前文網格視圖(GridView)闡釋了網格視圖, 本文會演示另一種常用於以水平滾動方式顯示項目列的視圖, 畫廊(Gallery).


可以比較這篇文章和網格視圖(GridView)的源碼的區別, 主要是在getView()之上.

先創建一個文件夾/res/drawable, 並複製一些PNG圖形到/res/drawable內. 我使用的文件名為a01.png~a15.png.

修改main.xml, 使用Gallery.

<?xml version="1.0" encoding="utf-8"?>
<LinearLayout xmlns:android="http://schemas.android.com/apk/res/android"
android:orientation="vertical"
android:layout_width="fill_parent"
android:layout_height="fill_parent"
>
<Gallery
android:id="@+id/gallery"
android:layout_width="fill_parent"
android:layout_height="100dp"
android:spacing="10dp"
/>
</LinearLayout>


修改源碼.

package com.AndroidGallery;

import android.app.Activity;
import android.content.Context;
import android.os.Bundle;
import android.view.View;
import android.view.ViewGroup;
import android.view.ViewGroup.LayoutParams;
import android.widget.BaseAdapter;
import android.widget.Gallery;
import android.widget.ImageView;

public class AndroidGallery extends Activity {
/** Called when the activity is first created. */
@Override
public void onCreate(Bundle savedInstanceState) {
super.onCreate(savedInstanceState);
setContentView(R.layout.main);

Gallery myGallery = (Gallery)findViewById(R.id.gallery);
myGallery.setAdapter(new ImageAdapter(this));
}

public class ImageAdapter extends BaseAdapter{
private Context context;

private Integer[] mThumbIds = {
R.drawable.a01,
R.drawable.a02,
R.drawable.a03,
R.drawable.a04,
R.drawable.a05,
R.drawable.a06,
R.drawable.a07,
R.drawable.a08,
R.drawable.a09,
R.drawable.a10,
R.drawable.a11,
R.drawable.a12,
R.drawable.a13,
R.drawable.a14,
R.drawable.a15,
};

public ImageAdapter(Context c){
context = c;
}

@Override
public int getCount() {
// TODO Auto-generated method stub
return mThumbIds.length;
}

@Override
public Object getItem(int position) {
// TODO Auto-generated method stub
return mThumbIds[position];
}

@Override
public long getItemId(int position) {
// TODO Auto-generated method stub
return position;
}

@Override
public View getView(int position, View convertView, ViewGroup parent) {
// TODO Auto-generated method stub
ImageView imageView;
if (convertView == null) {
// if it's not recycled, initialize some attributes
imageView = new ImageView(context);
imageView.setLayoutParams(new Gallery.LayoutParams(LayoutParams.WRAP_CONTENT, LayoutParams.WRAP_CONTENT));
imageView.setScaleType(ImageView.ScaleType.CENTER_CROP);
imageView.setPadding(8, 8, 8, 8);
} else {
imageView = (ImageView) convertView;
}

imageView.setImageResource(mThumbIds[position]);
return imageView;
}


}
}


下一篇文章: 實現Gallery的OnItemSelectedListener.


2010年1月7日星期四

Android Scripting Environment (ASE), ase_r16.

上月剛介紹了Android Scripting Environment (ASE), 這是Android設備上的腳本語言環境, 當時是ase_r15.

還不夠一個月, 新版本(ase_r16)推出了.


鏈接: android-scripting Project Home

有關如何安裝, 請參考另一篇文章, "Android Scripting Environment (ASE) - Android設備上的腳本語言".


2010年1月6日星期三

Nexus One 出台了!

Nexus One Phone - Web meets phone


http://www.google.com/phone

getView() 和 convertView

網格視圖(GridView)例子中, 我們從擴展BaseAdapter創建了一個新類, ImageAdapter. 然後重寫了一些方法, 包括: getCount(), getItem(), getItemId(), getView()和構造器ImageAdapter(). 其中, getCount(), getItem(), getItemId()和構造器ImageAdapter()都比較直接, 容易理解. 而getView()就是真正返回一個自定義視圖的方法. 這是一個需要產生自定義視圖的做法.

當中, 以下代碼是創建一個新的View.

imageView = new ImageView(context);
imageView.setLayoutParams(new GridView.LayoutParams(85, 85));
imageView.setScaleType(ImageView.ScaleType.CENTER_CROP);
imageView.setPadding(8, 8, 8, 8);


但是,當(convertView!=null)時, 便沒有必要重新創建, 重用舊的(即是convertView)便可以; 這可以大大減少程序運行的時間.


網格視圖(GridView)

網格視圖(GridView)把來自列表適配器(ListAdapter)的項目顯示在一個二維的空間(滾動格)上.

(可以比較另一種視圖, 畫廊(Gallery)).

這次實現一個GridView, 顯示/res內的drawable物件.

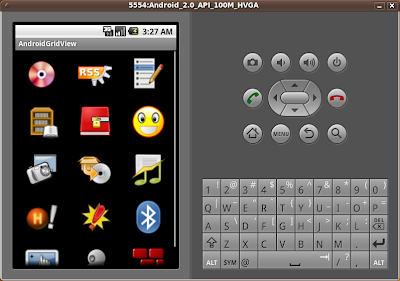
網格視圖(GridView)

先創建一個文件夾/res/drawable, 並複製一些PNG圖形到/res/drawable內. 我使用的文件名為a01.png~a15.png.

修改main.xml, 使用GridView.
<?xml version="1.0" encoding="utf-8"?>
<GridView xmlns:android="http://schemas.android.com/apk/res/android"
android:id="@+id/gridview"
android:layout_width="fill_parent"
android:layout_height="fill_parent"
android:numColumns="auto_fit"
android:verticalSpacing="10dp"
android:horizontalSpacing="10dp"
android:columnWidth="90dp"
android:stretchMode="columnWidth"
android:gravity="center"
/>


創建網格視圖(GridView), 需要擴展BaseAdapter創建一個新類ImageAdapter, 並需重寫一些方法, 詳細請參考代碼內容及另一篇文章getView() 和 convertView.
package com.AndroidGridView;

import android.app.Activity;
import android.content.Context;
import android.os.Bundle;
import android.view.View;
import android.view.ViewGroup;
import android.widget.BaseAdapter;
import android.widget.GridView;
import android.widget.ImageView;

public class AndroidGridView extends Activity {
/** Called when the activity is first created. */
@Override
public void onCreate(Bundle savedInstanceState) {
super.onCreate(savedInstanceState);
setContentView(R.layout.main);

GridView gridview = (GridView)findViewById(R.id.gridview);
gridview.setAdapter(new ImageAdapter(this));
}

public class ImageAdapter extends BaseAdapter{
private Context context;

private Integer[] mThumbIds = {
R.drawable.a01,
R.drawable.a02,
R.drawable.a03,
R.drawable.a04,
R.drawable.a05,
R.drawable.a06,
R.drawable.a07,
R.drawable.a08,
R.drawable.a09,
R.drawable.a10,
R.drawable.a11,
R.drawable.a12,
R.drawable.a13,
R.drawable.a14,
R.drawable.a15,
};

public ImageAdapter(Context c){
context = c;
}

@Override
public int getCount() {
// TODO Auto-generated method stub
return mThumbIds.length;
}

@Override
public Object getItem(int position) {
// TODO Auto-generated method stub
return mThumbIds[position];
}

@Override
public long getItemId(int position) {
// TODO Auto-generated method stub
return position;
}

@Override
public View getView(int position, View convertView, ViewGroup parent) {
// TODO Auto-generated method stub
ImageView imageView;
if (convertView == null) {
// if it's not recycled, initialize some attributes
imageView = new ImageView(context);
imageView.setLayoutParams(new GridView.LayoutParams(85, 85));
imageView.setScaleType(ImageView.ScaleType.CENTER_CROP);
imageView.setPadding(8, 8, 8, 8);
} else {
imageView = (ImageView) convertView;
}

imageView.setImageResource(mThumbIds[position]);
return imageView;
}


}
}

2010年1月5日星期二

通過XML定義數組適配器(ArrayAdapter), 使用ArrayAdapter.createFromResource().

在上一個例子(下拉列表(Spinner))中, 我們使用編程代碼定義數組的內容. 其實數組適配器(ArrayAdapter)的內容亦可以使用ArrayAdapter.createFromResource(), 通過XML定義.

創建一個新的XML文件, res/values/arrays.xml
<?xml version="1.0" encoding="UTF-8"?>
<resources>
<string-array name="dayOfWeek">
<item>Sunday</item>
<item>Monday</item>
<item>Tuesday</item>
<item>Wednesday</item>
<item>Thursday</item>
<item>Friday</item>
<item>Saturday</item>
</string-array>
</resources>


修改主程序:

package com.AndroidSpinner;

import android.app.Activity;
import android.os.Bundle;
import android.view.View;
import android.widget.ArrayAdapter;
import android.widget.Button;
import android.widget.Spinner;
import android.widget.Toast;

public class AndroidSpinner extends Activity {

/** Called when the activity is first created. */
@Override
public void onCreate(Bundle savedInstanceState) {
super.onCreate(savedInstanceState);
setContentView(R.layout.main);

final Spinner mySpinner = (Spinner)findViewById(R.id.spinner);
Button myButton = (Button)findViewById(R.id.button);

ArrayAdapter<CharSequence> adapter =
ArrayAdapter.createFromResource(this, R.array.dayOfWeek,
android.R.layout.simple_spinner_item);
adapter.setDropDownViewResource(android.R.layout.simple_spinner_dropdown_item);
mySpinner.setAdapter(adapter);

myButton.setOnClickListener(
new Button.OnClickListener(){

@Override
public void onClick(View v) {
// TODO Auto-generated method stub
Toast
.makeText(AndroidSpinner.this,
(CharSequence) mySpinner.getSelectedItem(),
Toast.LENGTH_LONG)
.show();
}
});
}
}


main.xml跟原先的一樣; 可參考下拉列表(Spinner).


下拉列表(Spinner)

上一篇文章闡釋了適配器(Adapter), 列表適配器(ListAdapter)和數組適配器(ArrayAdapter), 來看看一個例子.


修改main.xml添加一個Spinner和一個Button.
<?xml version="1.0" encoding="utf-8"?>
<LinearLayout xmlns:android="http://schemas.android.com/apk/res/android"
android:orientation="vertical"
android:layout_width="fill_parent"
android:layout_height="fill_parent"
>
<TextView
android:layout_width="fill_parent"
android:layout_height="wrap_content"
android:text="@string/hello"
/>
<Spinner
android:id="@+id/spinner"
android:layout_width="fill_parent"
android:layout_height="wrap_content"
/>
<Button
android:id="@+id/button"
android:layout_width="fill_parent"
android:layout_height="wrap_content"
android:text="Read Day of Week"
/>
</LinearLayout>


然後修改主程序:

public class AndroidSpinner extends Activity {

private static final String[] dayOfWeek =
{"Sunday", "Monday", "Tuesday", "Wednesday",
"Thursday", "Friday", "Saturday"};
private ArrayAdapter<String> adapter;

/** Called when the activity is first created. */
@Override
public void onCreate(Bundle savedInstanceState) {
super.onCreate(savedInstanceState);
setContentView(R.layout.main);

final Spinner mySpinner = (Spinner)findViewById(R.id.spinner);
Button myButton = (Button)findViewById(R.id.button);

adapter = new ArrayAdapter<String>(this,
android.R.layout.simple_spinner_item, dayOfWeek);
adapter.setDropDownViewResource(android.R.layout.simple_spinner_dropdown_item);
mySpinner.setAdapter(adapter);

myButton.setOnClickListener(
new Button.OnClickListener(){

@Override
public void onClick(View v) {
// TODO Auto-generated method stub
Toast
.makeText(AndroidSpinner.this,
(CharSequence) mySpinner.getSelectedItem(),
Toast.LENGTH_LONG)
.show();
}
});
}
}


除此之外, 數組適配器(ArrayAdapter)的內容亦可以使用ArrayAdapter.createFromResource(), 通過XML定義.


2010年1月4日星期一

適配器(Adapter), 列表適配器(ListAdapter)和數組適配器(ArrayAdapter).

適配器(Adapter)對象充當AdapterView和其基礎數據之間的橋樑, 該適配器提供數據的存取, 還負責為數據集中的每個項目製作視圖(View).

列表適配器(ListAdapter)擴展適配器(Adapter), 它是ListView和其數據之間的橋樑, 在ListView能顯示ListAdapter包中的任何數據.

數組適配器(ArrayAdapter)是一個列表適配器(ListAdapter),負責管理一個由任意對象的數組所支持的ListView.

文字可能會較難理解, 來看看一個下拉列表(Spinner)的例子.


2010年1月3日星期日

日期選擇器(DatePicker)和時間選擇器(TimePicker)

日期選擇器(DatePicker)和時間選擇器(TimePicker)是讓用戶選擇月/日/年和小時/分鐘/AM或PM的小工具.

DatePicker

TimePicker

修改main.xml為整個LinearLayout添加兩個按鈕(Button)以激活日期選擇器(DatePicker)或時間選擇器(TimePicker).
<?xml version="1.0" encoding="utf-8"?>
<LinearLayout xmlns:android="http://schemas.android.com/apk/res/android"
android:orientation="vertical"
android:layout_width="fill_parent"
android:layout_height="fill_parent"
>
<TextView
android:layout_width="fill_parent"
android:layout_height="wrap_content"
android:text="@string/hello"
/>
<Button
android:id="@+id/datepickerbutton"
android:layout_width="fill_parent"
android:layout_height="wrap_content"
android:text="DatePicker"
/>
<Button
android:id="@+id/timepickerbutton"
android:layout_width="fill_parent"
android:layout_height="wrap_content"
android:text="TimePicker"
/>
</LinearLayout>


然後修改主程序:
package com.AndroidDatePicker;

import java.util.Calendar;

import android.app.Activity;
import android.app.DatePickerDialog;
import android.app.Dialog;
import android.app.TimePickerDialog;
import android.os.Bundle;
import android.view.View;
import android.widget.Button;
import android.widget.DatePicker;
import android.widget.TimePicker;
import android.widget.Toast;

public class AndroidDatePicker extends Activity {

private int myYear, myMonth, myDay, myHour, myMinute;
static final int ID_DATEPICKER = 0;
static final int ID_TIMEPICKER = 1;

/** Called when the activity is first created. */
@Override
public void onCreate(Bundle savedInstanceState) {
super.onCreate(savedInstanceState);
setContentView(R.layout.main);

Button datePickerButton = (Button)findViewById(R.id.datepickerbutton);
Button timePickerButton = (Button)findViewById(R.id.timepickerbutton);
datePickerButton.setOnClickListener(datePickerButtonOnClickListener);
timePickerButton.setOnClickListener(timePickerButtonOnClickListener);
}

private Button.OnClickListener datePickerButtonOnClickListener
= new Button.OnClickListener(){

@Override
public void onClick(View v) {
// TODO Auto-generated method stub
final Calendar c = Calendar.getInstance();
myYear = c.get(Calendar.YEAR);
myMonth = c.get(Calendar.MONTH);
myDay = c.get(Calendar.DAY_OF_MONTH);
showDialog(ID_DATEPICKER);
}
};

private Button.OnClickListener timePickerButtonOnClickListener
= new Button.OnClickListener(){

@Override
public void onClick(View v) {
// TODO Auto-generated method stub
final Calendar c = Calendar.getInstance();
myHour = c.get(Calendar.HOUR_OF_DAY);
myMinute = c.get(Calendar.MINUTE);
showDialog(ID_TIMEPICKER);
}
};

@Override
protected Dialog onCreateDialog(int id) {
// TODO Auto-generated method stub
switch(id){
case ID_DATEPICKER:
Toast.makeText(AndroidDatePicker.this,
"- onCreateDialog(ID_DATEPICKER) -",
Toast.LENGTH_LONG).show();
return new DatePickerDialog(this,
myDateSetListener,
myYear, myMonth, myDay);
case ID_TIMEPICKER:
Toast.makeText(AndroidDatePicker.this,
"- onCreateDialog(ID_TIMEPICKER) -",
Toast.LENGTH_LONG).show();
return new TimePickerDialog(this,
myTimeSetListener,
myHour, myMinute, false);
default:
return null;

}
}

private DatePickerDialog.OnDateSetListener myDateSetListener
= new DatePickerDialog.OnDateSetListener(){

@Override
public void onDateSet(DatePicker view, int year,
int monthOfYear, int dayOfMonth) {
// TODO Auto-generated method stub
String date = "Year: " + String.valueOf(year) + "\n"
+ "Month: " + String.valueOf(monthOfYear+1) + "\n"
+ "Day: " + String.valueOf(dayOfMonth);
Toast.makeText(AndroidDatePicker.this, date,
Toast.LENGTH_LONG).show();
}
};

private TimePickerDialog.OnTimeSetListener myTimeSetListener
= new TimePickerDialog.OnTimeSetListener(){

@Override
public void onTimeSet(TimePicker view, int hourOfDay, int minute) {
// TODO Auto-generated method stub
String time = "Hour: " + String.valueOf(hourOfDay) + "\n"
+ "Minute: " + String.valueOf(minute);
Toast.makeText(AndroidDatePicker.this, time,
Toast.LENGTH_LONG).show();
}
};

}


使用XML定義子菜單(sub menu)

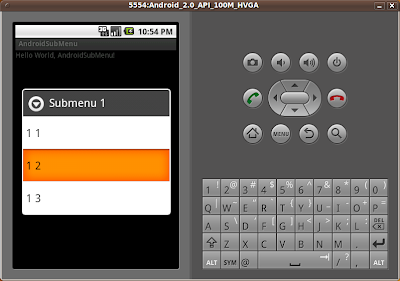
除了使用addSubMenu()外, 子菜單(sub menu)亦可以使用XML定義.

Sub Menu
Sub Menu

例如:

首先創建一個文件夾, /res/menu

並創建一個新/res/menu/的menu.xml文件
<?xml version="1.0" encoding="UTF-8"?>
<menu xmlns:android="http://schemas.android.com/apk/res/android">
<item android:title="Submenu 1">
<menu>
<item android:id="@+id/option11"
android:title="1 1" />
<item android:id="@+id/option12"
android:title="1 2" />
<item android:id="@+id/option13"
android:title="1 3" />
</menu>
</item>
<item android:title="Submenu 2">
<menu>
<item android:id="@+id/option21"
android:title="2 1" />
<item android:id="@+id/option22"
android:title="2 2" />
</menu>
</item>
<item android:title="Submenu 3">
<menu>
<item android:id="@+id/option31"
android:title="3 1" />
<item android:id="@+id/option32"
android:title="3 2" />
</menu>
</item>
</menu>


修改主程序, 重寫onCreateOptionsMenu(Menu)和onOptionsItemSelected(MenuItem):

@Override
public boolean onCreateOptionsMenu(Menu menu) {
// TODO Auto-generated method stub
MenuInflater inflater = getMenuInflater();
inflater.inflate(R.menu.menu, menu);
return true;
}

@Override
public boolean onOptionsItemSelected(MenuItem item) {
// TODO Auto-generated method stub
String myMenuitem = null;
switch (item.getItemId()){
case (R.id.option11): myMenuitem="option 1 1"; break;
case (R.id.option12): myMenuitem="option 1 2"; break;
case (R.id.option13): myMenuitem="option 1 3"; break;
case (R.id.option21): myMenuitem="option 1 1"; break;
case (R.id.option22): myMenuitem="option 1 2"; break;
case (R.id.option31): myMenuitem="option 1 1"; break;
case (R.id.option32): myMenuitem="option 1 2"; break;
}
Toast.makeText(this, myMenuitem, Toast.LENGTH_LONG).show();
return true;
}

子菜單(Submenu), 使用addSubMenu().

子菜單(sub menu)可以添加在任何菜單(menu),除了另一個子菜單.

Sub Menu
Sub Menu

可以使用addSubMenu()把子菜單添加到現有的菜單. 這將返回一個子菜單(SubMenu)對象. 然後, 您可以把額外的項目添加到這個菜單上.

修改主程序, 重寫onCreateOptionsMenu(Menu)和onOptionsItemSelected(MenuItem):

@Override
public boolean onCreateOptionsMenu(Menu menu) {
// TODO Auto-generated method stub
boolean result = super.onCreateOptionsMenu(menu);
SubMenu Menu_1 = menu.addSubMenu(0, 0, 0, "Menu_1");
Menu_1.add(0, 1, 0, "Sub Menu 1 1");
Menu_1.add(0, 2, 0, "Sub Menu 1 2");
Menu_1.add(0, 3, 0, "Sub Menu 1 3");

SubMenu Menu_2 = menu.addSubMenu(1, 4, 0, "Menu_2");
Menu_2.add(1, 5, 0, "Sub Menu 2 1");
Menu_2.add(1, 6, 0, "Sub Menu 2 2");

return result;
}

@Override
public boolean onOptionsItemSelected(MenuItem item) {
// TODO Auto-generated method stub
String myMenuitem = null;
switch(item.getItemId()){
case 0:
myMenuitem = "Menu 1";
break;
case 1:
myMenuitem = "Sub Menu 1 1";
break;
case 2:
myMenuitem = "Sub Menu 1 2";
break;
case 3:
myMenuitem = "Sub Menu 1 3";
break;
case 4:
myMenuitem = "Menu 2";
break;
case 5:
myMenuitem = "Sub Menu 2 1";
break;
case 6:
myMenuitem = "Sub Menu 2 2";
break;
}

Toast.makeText(this, myMenuitem, Toast.LENGTH_LONG).show();
return true;
}


除了使用addSubMenu()外, 子菜單(sub menu)亦可以使用XML定義.