package com.AndroidDynList;
import android.app.Activity;
import android.app.AlertDialog;
import android.content.DialogInterface;
import android.os.Bundle;
import android.view.View;
import android.widget.AdapterView;
import android.widget.ArrayAdapter;
import android.widget.Button;
import android.widget.EditText;
import android.widget.ListView;
public class AndroidDynList extends Activity {
EditText input;
Button add, clear;
ListView listview;
ArrayAdapter<String> MyArrayAdapter;
/** Called when the activity is first created. */
@Override
public void onCreate(Bundle savedInstanceState) {
super.onCreate(savedInstanceState);
setContentView(R.layout.main);
input = (EditText)findViewById(R.id.input);
add = (Button)findViewById(R.id.add);
clear = (Button)findViewById(R.id.clear);
listview = (ListView)findViewById(R.id.list);
MyArrayAdapter = new ArrayAdapter<String>(this, android.R.layout.simple_list_item_1);
listview.setAdapter(MyArrayAdapter);
add.setOnClickListener(addOnClickListener);
clear.setOnClickListener(clearOnClickListener);
listview.setOnItemClickListener(listViewOnItemClickListener);
}
private Button.OnClickListener addOnClickListener
= new Button.OnClickListener(){
@Override
public void onClick(View arg0) {
// TODO Auto-generated method stub
String newInput = input.getText().toString();
MyArrayAdapter.add(newInput);
MyArrayAdapter.notifyDataSetChanged();
}};
private Button.OnClickListener clearOnClickListener
= new Button.OnClickListener(){
@Override
public void onClick(View arg0) {
// TODO Auto-generated method stub
MyArrayAdapter.clear();
MyArrayAdapter.notifyDataSetChanged();
}};
private ListView.OnItemClickListener listViewOnItemClickListener
= new ListView.OnItemClickListener(){
@Override
public void onItemClick(AdapterView<?> parent, View view, final int position,
long id) {
// TODO Auto-generated method stub
final String strSelectedItem = parent.getItemAtPosition(position).toString();
AlertDialog.Builder delAlertDialog = new AlertDialog.Builder(AndroidDynList.this);
delAlertDialog.setTitle("- DELETE/Edit Selected Item? -");
delAlertDialog.setMessage(strSelectedItem);
delAlertDialog.setPositiveButton("OK", new DialogInterface.OnClickListener() {
// do something when the button is clicked
public void onClick(DialogInterface arg0, int arg1) {
MyArrayAdapter.remove(strSelectedItem);
MyArrayAdapter.notifyDataSetChanged();
}
});
delAlertDialog.setNeutralButton("Edit", new DialogInterface.OnClickListener() {
// do something when the button is clicked
public void onClick(DialogInterface arg0, int arg1) {
AlertDialog.Builder editDialog = new AlertDialog.Builder(AndroidDynList.this);
editDialog.setTitle("--- Edit ---");
final EditText editText = new EditText(AndroidDynList.this);
editText.setText(strSelectedItem);
editDialog.setView(editText);
editDialog.setPositiveButton("OK", new DialogInterface.OnClickListener() {
// do something when the button is clicked
public void onClick(DialogInterface arg0, int arg1) {
MyArrayAdapter.remove(strSelectedItem);
MyArrayAdapter.insert(editText.getText().toString(), position);
}});
editDialog.setNegativeButton("Cancel", new DialogInterface.OnClickListener() {
// do something when the button is clicked
public void onClick(DialogInterface arg0, int arg1) {
//...
}
});
editDialog.show();
}
});
delAlertDialog.setNegativeButton("Cancel", new DialogInterface.OnClickListener() {
// do something when the button is clicked
public void onClick(DialogInterface arg0, int arg1) {
//...
}
});
delAlertDialog.show();
}};
}
2011年5月31日星期二
動態修改列表視圖(ListView)的內容
修改前文"動態刪除列表視圖(ListView)的內容"的程序代碼, 在對話框(delAlertDialog)新增修改選項, 再建立另一個包含編輯文本視圖 (EditText) 的對話框(editDialog). 完成後, 通過 MyArrayAdapter.remove() 和 MyArrayAdapter.insert() 修改列表視圖(ListView)的內容.
2011年5月29日星期日
利用 AlertDialog.Builder 創建包含編輯文本視圖 (EditText) 的對話框
package com.AndroidEditDialog;
import android.app.Activity;
import android.app.AlertDialog;
import android.content.DialogInterface;
import android.os.Bundle;
import android.view.View;
import android.widget.Button;
import android.widget.EditText;
import android.widget.TextView;
public class AndroidEditDialog extends Activity {
Button btnEdit;
TextView textOut;
/** Called when the activity is first created. */
@Override
public void onCreate(Bundle savedInstanceState) {
super.onCreate(savedInstanceState);
setContentView(R.layout.main);
btnEdit = (Button)findViewById(R.id.edit);
textOut = (TextView)findViewById(R.id.textout);
btnEdit.setOnClickListener(btnEditOnClickListener);
}
private Button.OnClickListener btnEditOnClickListener
= new Button.OnClickListener(){
@Override
public void onClick(View arg0) {
// TODO Auto-generated method stub
AlertDialog.Builder editDialog = new AlertDialog.Builder(AndroidEditDialog.this);
editDialog.setTitle("--- Edit ---");
final EditText editText = new EditText(AndroidEditDialog.this);
editText.setText(textOut.getText());
editDialog.setView(editText);
editDialog.setPositiveButton("OK", new DialogInterface.OnClickListener() {
// do something when the button is clicked
public void onClick(DialogInterface arg0, int arg1) {
textOut.setText(editText.getText().toString());
}
});
editDialog.setNegativeButton("Cancel", new DialogInterface.OnClickListener() {
// do something when the button is clicked
public void onClick(DialogInterface arg0, int arg1) {
//...
}
});
editDialog.show();
}};
}
<?xml version="1.0" encoding="utf-8"?>
<LinearLayout xmlns:android="http://schemas.android.com/apk/res/android"
android:orientation="vertical"
android:layout_width="fill_parent"
android:layout_height="fill_parent"
>
<TextView
android:layout_width="fill_parent"
android:layout_height="wrap_content"
android:text="@string/hello"
/>
<Button
android:id="@+id/edit"
android:layout_width="fill_parent"
android:layout_height="wrap_content"
android:text="Edit"
/>
<TextView
android:id="@+id/textout"
android:layout_width="fill_parent"
android:layout_height="wrap_content"
android:text="You can change it"
/>
</LinearLayout>
2011年5月28日星期六
動態刪除列表視圖(ListView)的內容
跟進前一文"動態添加列表視圖(ListView)的內容"的帖子, 新增刪除的功能.
創建列表視圖(ListView)的 OnItemClickListener(), 當用戶點擊列表視圖的一個項目, 然後打開一個對話框, 如果用戶點擊"OK", 此一項目將被刪除.
佈局文件(main.xml)無需修改, 參閱前文"動態添加列表視圖(ListView)的內容".
修改主要代碼 AndroidDynList.java, 添加 listViewOnItemClickListener.
相關文章:
- 動態修改列表視圖(ListView)的內容
創建列表視圖(ListView)的 OnItemClickListener(), 當用戶點擊列表視圖的一個項目, 然後打開一個對話框, 如果用戶點擊"OK", 此一項目將被刪除.
佈局文件(main.xml)無需修改, 參閱前文"動態添加列表視圖(ListView)的內容".
修改主要代碼 AndroidDynList.java, 添加 listViewOnItemClickListener.
package com.AndroidDynList;
import android.app.Activity;
import android.app.AlertDialog;
import android.content.DialogInterface;
import android.os.Bundle;
import android.view.View;
import android.widget.AdapterView;
import android.widget.ArrayAdapter;
import android.widget.Button;
import android.widget.EditText;
import android.widget.ListView;
public class AndroidDynList extends Activity {
EditText input;
Button add, clear;
ListView listview;
ArrayAdapter<String> MyArrayAdapter;
/** Called when the activity is first created. */
@Override
public void onCreate(Bundle savedInstanceState) {
super.onCreate(savedInstanceState);
setContentView(R.layout.main);
input = (EditText)findViewById(R.id.input);
add = (Button)findViewById(R.id.add);
clear = (Button)findViewById(R.id.clear);
listview = (ListView)findViewById(R.id.list);
MyArrayAdapter = new ArrayAdapter<String>(this, android.R.layout.simple_list_item_1);
listview.setAdapter(MyArrayAdapter);
add.setOnClickListener(addOnClickListener);
clear.setOnClickListener(clearOnClickListener);
listview.setOnItemClickListener(listViewOnItemClickListener);
}
private Button.OnClickListener addOnClickListener
= new Button.OnClickListener(){
@Override
public void onClick(View arg0) {
// TODO Auto-generated method stub
String newInput = input.getText().toString();
MyArrayAdapter.add(newInput);
MyArrayAdapter.notifyDataSetChanged();
}};
private Button.OnClickListener clearOnClickListener
= new Button.OnClickListener(){
@Override
public void onClick(View arg0) {
// TODO Auto-generated method stub
MyArrayAdapter.clear();
MyArrayAdapter.notifyDataSetChanged();
}};
private ListView.OnItemClickListener listViewOnItemClickListener
= new ListView.OnItemClickListener(){
@Override
public void onItemClick(AdapterView<?> parent, View view, int position,
long id) {
// TODO Auto-generated method stub
final String strSelectedItem = parent.getItemAtPosition(position).toString();
AlertDialog.Builder delAlertDialog = new AlertDialog.Builder(AndroidDynList.this);
delAlertDialog.setTitle("- DELETE Selected Item? -");
delAlertDialog.setMessage(strSelectedItem);
delAlertDialog.setPositiveButton("OK", new DialogInterface.OnClickListener() {
// do something when the button is clicked
public void onClick(DialogInterface arg0, int arg1) {
MyArrayAdapter.remove(strSelectedItem);
MyArrayAdapter.notifyDataSetChanged();
}
});
delAlertDialog.setNegativeButton("Cancel", new DialogInterface.OnClickListener() {
// do something when the button is clicked
public void onClick(DialogInterface arg0, int arg1) {
//...
}
});
delAlertDialog.show();
}};
}
相關文章:
- 動態修改列表視圖(ListView)的內容
動態添加列表視圖(ListView)的內容
本範例先創建一個空的陣列適配器(ArrayAdapter), 它是一個列表視圖(ListView)的適配器(Adapter). 然後動態添加它的內容.
相關文章:
- 動態刪除列表視圖(ListView)的內容
package com.AndroidDynList;
import android.app.Activity;
import android.os.Bundle;
import android.view.View;
import android.widget.ArrayAdapter;
import android.widget.Button;
import android.widget.EditText;
import android.widget.ListView;
public class AndroidDynList extends Activity {
EditText input;
Button add, clear;
ListView listview;
ArrayAdapter<String> MyArrayAdapter;
/** Called when the activity is first created. */
@Override
public void onCreate(Bundle savedInstanceState) {
super.onCreate(savedInstanceState);
setContentView(R.layout.main);
input = (EditText)findViewById(R.id.input);
add = (Button)findViewById(R.id.add);
clear = (Button)findViewById(R.id.clear);
listview = (ListView)findViewById(R.id.list);
MyArrayAdapter = new ArrayAdapter<String>(this, android.R.layout.simple_list_item_1);
listview.setAdapter(MyArrayAdapter);
add.setOnClickListener(addOnClickListener);
clear.setOnClickListener(clearOnClickListener);
}
private Button.OnClickListener addOnClickListener
= new Button.OnClickListener(){
@Override
public void onClick(View arg0) {
// TODO Auto-generated method stub
String newInput = input.getText().toString();
MyArrayAdapter.add(newInput);
MyArrayAdapter.notifyDataSetChanged();
}};
private Button.OnClickListener clearOnClickListener
= new Button.OnClickListener(){
@Override
public void onClick(View arg0) {
// TODO Auto-generated method stub
MyArrayAdapter.clear();
MyArrayAdapter.notifyDataSetChanged();
}};
}
<?xml version="1.0" encoding="utf-8"?>
<LinearLayout xmlns:android="http://schemas.android.com/apk/res/android"
android:orientation="vertical"
android:layout_width="fill_parent"
android:layout_height="fill_parent"
>
<TextView
android:layout_width="fill_parent"
android:layout_height="wrap_content"
android:text="@string/hello"
/>
<EditText
android:id="@+id/input"
android:layout_width="fill_parent"
android:layout_height="wrap_content"
/>
<Button
android:id="@+id/add"
android:layout_width="fill_parent"
android:layout_height="wrap_content"
android:text="Add"
/>
<Button
android:id="@+id/clear"
android:layout_width="fill_parent"
android:layout_height="wrap_content"
android:text="Clear"
/>
<ListView
android:id="@+id/list"
android:layout_width="fill_parent"
android:layout_height="wrap_content"
/>
</LinearLayout>
相關文章:
- 動態刪除列表視圖(ListView)的內容
2011年5月26日星期四
2011年5月23日星期一
創建自定義的 GLSurfaceView,以處理用戶輸入
把前面的"GLSurfaceView 示例"修改, 創建自定義的GLSurfaceView,並實現onTouchEvent()函數, 便可以處理用戶輸入.
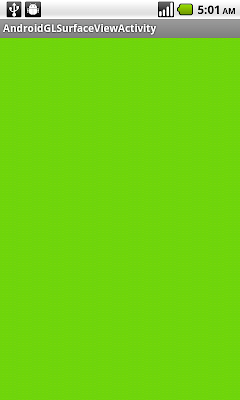
本例子中, 用戶在屏幕上移動手指, 畫面顏色會根據而改變.
AndroidGLSurfaceViewActivity.java
MyRenderer.java
本例子中, 用戶在屏幕上移動手指, 畫面顏色會根據而改變.
AndroidGLSurfaceViewActivity.java
package com.AndroidGLSurfaceViewActivity;
import android.app.Activity;
import android.content.Context;
import android.opengl.GLSurfaceView;
import android.os.Bundle;
import android.view.MotionEvent;
public class AndroidGLSurfaceViewActivity extends Activity {
private MyGLSurfaceView myGLSurfaceView;
/** Called when the activity is first created. */
@Override
public void onCreate(Bundle savedInstanceState) {
super.onCreate(savedInstanceState);
// Create our Preview view and set it as the content of our
// Activity
myGLSurfaceView = new MyGLSurfaceView(this);
setContentView(myGLSurfaceView);
}
@Override
protected void onResume() {
super.onResume();
myGLSurfaceView.onResume();
}
@Override
protected void onPause() {
super.onPause();
myGLSurfaceView.onPause();
}
class MyGLSurfaceView extends GLSurfaceView{
MyRenderer myRenderer;
public MyGLSurfaceView(Context context) {
super(context);
// TODO Auto-generated constructor stub
myRenderer = new MyRenderer();
setRenderer(myRenderer);
}
@Override
public boolean onTouchEvent(final MotionEvent event) {
// TODO Auto-generated method stub
queueEvent(new Runnable(){
public void run() {
myRenderer.setColor(event.getX()/getWidth(),
event.getY()/getHeight(), 1.0f);
}});
return true;
}
}
}
MyRenderer.java
package com.AndroidGLSurfaceViewActivity;
import javax.microedition.khronos.egl.EGLConfig;
import javax.microedition.khronos.opengles.GL10;
public class MyRenderer implements android.opengl.GLSurfaceView.Renderer{
private float red = 0;
private float green = 0;
private float blue = 0;
@Override
public void onDrawFrame(GL10 gl) {
// TODO Auto-generated method stub
gl.glClearColor(red, green, blue, 1.0f);
gl.glClear(GL10.GL_COLOR_BUFFER_BIT);
}
@Override
public void onSurfaceChanged(GL10 arg0, int arg1, int arg2) {
// TODO Auto-generated method stub
}
@Override
public void onSurfaceCreated(GL10 arg0, EGLConfig arg1) {
// TODO Auto-generated method stub
}
public void setColor(float r, float g, float b){
red = r;
green = g;
blue = b;
}
}
2011年5月21日星期六
谷歌 Google I/O 2011 主題演講重溫
兩天的主題演講強調了兩個最重要的開發平台, Android 和 Chrome, 的動力和願景.
第一天主題演講主題為"Momentum, Mobile and More"
公佈 Movies in Android Market, Music Beta by Google, Android@Home, Android開放配件(Android Open Accessory), 新的冰淇淋三明治( Ice Cream Sandwich)標誌的預覽.
第二天的是所有關於 Chrome, 討論了經由 GWT 和 App Engine 創建的憤怒鳥 HTML5 版, Chromebook 以及 in-app payments.
第一天主題演講主題為"Momentum, Mobile and More"
公佈 Movies in Android Market, Music Beta by Google, Android@Home, Android開放配件(Android Open Accessory), 新的冰淇淋三明治( Ice Cream Sandwich)標誌的預覽.
第二天的是所有關於 Chrome, 討論了經由 GWT 和 App Engine 創建的憤怒鳥 HTML5 版, Chromebook 以及 in-app payments.
2011年5月20日星期五
Android開放配件應用程序接口(Android Open Accessory APIs)
上星期 Google I/O 2011 宣布 Android的開放配件應用程序接口(Android Open Accessory APIs). 這些 API 允許 USB 配件連接到運行 Android 3.1 或 Android 2.3.4 的 Android 設備.
Android開發者博客剛剛發布一編文章集中討論配件模式(accessory mode), 可供參考: A Bright Idea: Android Open Accessories
最簡單的 GLSurfaceView 示例
文章"OpenGL 的工作示例"提供一個使用 GLSurfaceView 實現彩色立方體的工作示例; 其實,這是一個來自 Android API 文件的示例. 對於初學者(包括筆者本人)來說 - 它太複雜了!
現在,我把它簡化, 不要立方體. 只通過 OpenGL ES 的 glClearColor() 和 glClear() 指令, 實現一個簡單的隨機顏色 GLSurfaceView.
關於 OpenGL ES 指令的詳細描述, 請瀏覽: http://www.khronos.org/
從這個例子中, 可以知道,我們主要的工作是在 MyRenderer 類的 onDrawFrame() 回調函數中.
關於 android.opengl.GLSurfaceView.Renderer:
它是一個通用的渲染器接口, 負責調用 OpenGL. 詳細可參考 Android Developers Reference, GLSurfaceView.Renderer.
相關文章:
- 創建自定義的 GLSurfaceView,以處理用戶輸入
現在,我把它簡化, 不要立方體. 只通過 OpenGL ES 的 glClearColor() 和 glClear() 指令, 實現一個簡單的隨機顏色 GLSurfaceView.
關於 OpenGL ES 指令的詳細描述, 請瀏覽: http://www.khronos.org/
從這個例子中, 可以知道,我們主要的工作是在 MyRenderer 類的 onDrawFrame() 回調函數中.
關於 android.opengl.GLSurfaceView.Renderer:
它是一個通用的渲染器接口, 負責調用 OpenGL. 詳細可參考 Android Developers Reference, GLSurfaceView.Renderer.
package com.AndroidGLSurfaceViewActivity;
import android.app.Activity;
import android.opengl.GLSurfaceView;
import android.os.Bundle;
public class AndroidGLSurfaceViewActivity extends Activity {
private GLSurfaceView mGLSurfaceView;
/** Called when the activity is first created. */
@Override
public void onCreate(Bundle savedInstanceState) {
super.onCreate(savedInstanceState);
// Create our Preview view and set it as the content of our
// Activity
mGLSurfaceView = new GLSurfaceView(this);
mGLSurfaceView.setRenderer(new MyRenderer());
setContentView(mGLSurfaceView);
}
@Override
protected void onResume() {
super.onResume();
mGLSurfaceView.onResume();
}
@Override
protected void onPause() {
super.onPause();
mGLSurfaceView.onPause();
}
}
package com.AndroidGLSurfaceViewActivity;
import java.util.Random;
import javax.microedition.khronos.egl.EGLConfig;
import javax.microedition.khronos.opengles.GL10;
public class MyRenderer implements android.opengl.GLSurfaceView.Renderer{
Random random = new Random();
@Override
public void onDrawFrame(GL10 gl) {
// TODO Auto-generated method stub
gl.glClearColor(
random.nextFloat(), //Red
random.nextFloat(), //Green
random.nextFloat(), //Blue
1); //Alpha
gl.glClear(GL10.GL_COLOR_BUFFER_BIT);
}
@Override
public void onSurfaceChanged(GL10 arg0, int arg1, int arg2) {
// TODO Auto-generated method stub
}
@Override
public void onSurfaceCreated(GL10 arg0, EGLConfig arg1) {
// TODO Auto-generated method stub
}
}
相關文章:
- 創建自定義的 GLSurfaceView,以處理用戶輸入
2011年5月19日星期四
Droid 字的出處
"Droids"是指機器人,出於星球大戰電影,書籍和電視劇。主要是由星球大戰特效天才 John Stears 創造。"Droid"這個字是由"Android"剪切而來。 "droid"這個字是盧卡斯電影有限公司的註冊商標。
參考:
~ Wikipedia - Droid (robot)
~ Wikipedia - Star Wars: Droids
Android 其實是什麼意思?
Android是一個外觀和行為都像一個人的機器人或人工合成生物體。雖然"Android"並沒有特定性別,不過普遍"Android"指男性,而"Gynoid"指女性。
參考:
~ Wikipedia - Android (robot)
2011年5月18日星期三
2011年5月14日星期六
OpenGL 的工作示例
以下是如何使用高階應用程序接口實現 OpenGL.
- 編寫一個自定義視圖的子類。
- 獲取一個OpenGLContext 的 handle,它提供了訪問 OpenGL 的功能。
- 在你的視圖的OnDraw()方法,獲得一個GL對象句柄,一個 GL對象的 handle,並使用它的方法進行 GL 操作。
一個使用 OpenGL 實現經典 ColorCube 的工作示例: com.android.samples.graphics.GLSurfaceViewActivity.java。
AndroidGLSurfaceViewActivity.java
CubeRenderer.java
Cube.java
相關文章:
- 最簡單的 GLSurfaceView 示例
- 編寫一個自定義視圖的子類。
- 獲取一個OpenGLContext 的 handle,它提供了訪問 OpenGL 的功能。
- 在你的視圖的OnDraw()方法,獲得一個GL對象句柄,一個 GL對象的 handle,並使用它的方法進行 GL 操作。
一個使用 OpenGL 實現經典 ColorCube 的工作示例: com.android.samples.graphics.GLSurfaceViewActivity.java。
AndroidGLSurfaceViewActivity.java
package com.AndroidGLSurfaceViewActivity;
import android.app.Activity;
import android.opengl.GLSurfaceView;
import android.os.Bundle;
public class AndroidGLSurfaceViewActivity extends Activity {
private GLSurfaceView mGLSurfaceView;
/** Called when the activity is first created. */
@Override
public void onCreate(Bundle savedInstanceState) {
super.onCreate(savedInstanceState);
// Create our Preview view and set it as the content of our
// Activity
mGLSurfaceView = new GLSurfaceView(this);
mGLSurfaceView.setRenderer(new CubeRenderer(false));
setContentView(mGLSurfaceView);
}
@Override
protected void onResume() {
super.onResume();
mGLSurfaceView.onResume();
}
@Override
protected void onPause() {
super.onPause();
mGLSurfaceView.onPause();
}
}
CubeRenderer.java
package com.AndroidGLSurfaceViewActivity;
import javax.microedition.khronos.egl.EGLConfig;
import javax.microedition.khronos.opengles.GL10;
public class CubeRenderer implements android.opengl.GLSurfaceView.Renderer
{
private boolean mTranslucentBackground;
private Cube mCube;
private float mAngle;
public CubeRenderer(boolean useTranslucentBackground) {
mTranslucentBackground = useTranslucentBackground;
mCube = new Cube();
}
@Override
public void onDrawFrame(GL10 gl) {
/*
* Usually, the first thing one might want to do is to clear
* the screen. The most efficient way of doing this is to use
* glClear().
*/
gl.glClear(GL10.GL_COLOR_BUFFER_BIT | GL10.GL_DEPTH_BUFFER_BIT);
/*
* Now we're ready to draw some 3D objects
*/
gl.glMatrixMode(GL10.GL_MODELVIEW);
gl.glLoadIdentity();
gl.glTranslatef(0, 0, -3.0f);
gl.glRotatef(mAngle, 0, 1, 0);
gl.glRotatef(mAngle*0.25f, 1, 0, 0);
gl.glEnableClientState(GL10.GL_VERTEX_ARRAY);
gl.glEnableClientState(GL10.GL_COLOR_ARRAY);
mCube.draw(gl);
gl.glRotatef(mAngle*2.0f, 0, 1, 1);
gl.glTranslatef(0.5f, 0.5f, 0.5f);
mCube.draw(gl);
mAngle += 1.2f;
}
@Override
public void onSurfaceChanged(GL10 gl, int width, int height) {
gl.glViewport(0, 0, width, height);
/*
* Set our projection matrix. This doesn't have to be done
* each time we draw, but usually a new projection needs to
* be set when the viewport is resized.
*/
float ratio = (float) width / height;
gl.glMatrixMode(GL10.GL_PROJECTION);
gl.glLoadIdentity();
gl.glFrustumf(-ratio, ratio, -1, 1, 1, 10);
}
@Override
public void onSurfaceCreated(GL10 gl, EGLConfig config) {
/*
* By default, OpenGL enables features that improve quality
* but reduce performance. One might want to tweak that
* especially on software renderer.
*/
gl.glDisable(GL10.GL_DITHER);
/*
* Some one-time OpenGL initialization can be made here
* probably based on features of this particular context
*/
gl.glHint(GL10.GL_PERSPECTIVE_CORRECTION_HINT,
GL10.GL_FASTEST);
if (mTranslucentBackground) {
gl.glClearColor(0,0,0,0);
} else {
gl.glClearColor(1,1,1,1);
}
gl.glEnable(GL10.GL_CULL_FACE);
gl.glShadeModel(GL10.GL_SMOOTH);
gl.glEnable(GL10.GL_DEPTH_TEST);
}
}
Cube.java
package com.AndroidGLSurfaceViewActivity;
import java.nio.ByteBuffer;
import java.nio.ByteOrder;
import java.nio.IntBuffer;
import javax.microedition.khronos.opengles.GL10;
public class Cube {
private IntBuffer mVertexBuffer;
private IntBuffer mColorBuffer;
private ByteBuffer mIndexBuffer;
public Cube()
{
int one = 0x10000;
int vertices[] = {
-one, -one, -one,
one, -one, -one,
one, one, -one,
-one, one, -one,
-one, -one, one,
one, -one, one,
one, one, one,
-one, one, one,
};
int colors[] = {
0, 0, 0, one,
one, 0, 0, one,
one, one, 0, one,
0, one, 0, one,
0, 0, one, one,
one, 0, one, one,
one, one, one, one,
0, one, one, one,
};
byte indices[] = {
0, 4, 5, 0, 5, 1,
1, 5, 6, 1, 6, 2,
2, 6, 7, 2, 7, 3,
3, 7, 4, 3, 4, 0,
4, 7, 6, 4, 6, 5,
3, 0, 1, 3, 1, 2
};
// Buffers to be passed to gl*Pointer() functions
// must be direct, i.e., they must be placed on the
// native heap where the garbage collector cannot
// move them.
//
// Buffers with multi-byte datatypes (e.g., short, int, float)
// must have their byte order set to native order
ByteBuffer vbb = ByteBuffer.allocateDirect(vertices.length*4);
vbb.order(ByteOrder.nativeOrder());
mVertexBuffer = vbb.asIntBuffer();
mVertexBuffer.put(vertices);
mVertexBuffer.position(0);
ByteBuffer cbb = ByteBuffer.allocateDirect(colors.length*4);
cbb.order(ByteOrder.nativeOrder());
mColorBuffer = cbb.asIntBuffer();
mColorBuffer.put(colors);
mColorBuffer.position(0);
mIndexBuffer = ByteBuffer.allocateDirect(indices.length);
mIndexBuffer.put(indices);
mIndexBuffer.position(0);
}
public void draw(GL10 gl)
{
gl.glFrontFace(gl.GL_CW);
gl.glVertexPointer(3, gl.GL_FIXED, 0, mVertexBuffer);
gl.glColorPointer(4, gl.GL_FIXED, 0, mColorBuffer);
gl.glDrawElements(gl.GL_TRIANGLES, 36, gl.GL_UNSIGNED_BYTE, mIndexBuffer);
}
}
相關文章:
- 最簡單的 GLSurfaceView 示例
2011年5月12日星期四
谷歌官方公佈 Chromebook
谷歌官方公佈 Chromebook, 首批將由三星(Samsung)和宏基(Acer)供應, 於6月15日在美國,英國,法國,德國,荷蘭,意大利和西班牙發售。
詳情:
- A new kind of computer: Chromebook
詳情:
- A new kind of computer: Chromebook
2011年5月11日星期三
Display.getRotation()
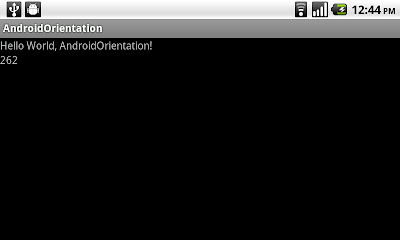
API level 8, Android 2.2, android.view.Display 類提供 getRotation() 函數, 它返回屏幕的“自然“旋轉方向。
測試這個功能, 需要啟用自動旋轉屏幕(Auto-rotate screen)功能.
相關文章:
- OrientationEventListener(方向事件監聽器)
測試這個功能, 需要啟用自動旋轉屏幕(Auto-rotate screen)功能.
package com.AndroidOrientation;
import android.app.Activity;
import android.content.Context;
import android.hardware.SensorManager;
import android.os.Bundle;
import android.view.Display;
import android.view.OrientationEventListener;
import android.view.Surface;
import android.view.WindowManager;
import android.widget.TextView;
import android.widget.Toast;
public class AndroidOrientation extends Activity{
TextView orientation;
MyOrientationEventListener myOrientationEventListener;
/** Called when the activity is first created. */
@Override
public void onCreate(Bundle savedInstanceState) {
super.onCreate(savedInstanceState);
setContentView(R.layout.main);
orientation = (TextView)findViewById(R.id.orientation);
myOrientationEventListener =
new MyOrientationEventListener(this, SensorManager.SENSOR_DELAY_NORMAL);
if (myOrientationEventListener.canDetectOrientation()){
myOrientationEventListener.enable();
}else{
Toast.makeText(AndroidOrientation.this,
"Can't Detect Orientation!",
Toast.LENGTH_LONG).show();
}
}
@Override
protected void onDestroy() {
// TODO Auto-generated method stub
super.onDestroy();
myOrientationEventListener.disable();
}
class MyOrientationEventListener extends OrientationEventListener{
public MyOrientationEventListener(Context context, int rate) {
super(context, rate);
// TODO Auto-generated constructor stub
}
@Override
public void onOrientationChanged(int arg0) {
// TODO Auto-generated method stub
String strRotation = "";
Display display = ((WindowManager)getSystemService(Context.WINDOW_SERVICE))
.getDefaultDisplay();
switch(display.getRotation()){
case(Surface.ROTATION_0):
strRotation = "Surface.ROTATION_0";
break;
case(Surface.ROTATION_90):
strRotation = "Surface.ROTATION_90";
break;
case(Surface.ROTATION_180):
strRotation = "Surface.ROTATION_180";
break;
case(Surface.ROTATION_270):
strRotation = "Surface.ROTATION_270";
break;
}
orientation.setText(String.valueOf(
strRotation + "\n" + arg0));
}
}
}
<?xml version="1.0" encoding="utf-8"?>
<LinearLayout xmlns:android="http://schemas.android.com/apk/res/android"
android:orientation="vertical"
android:layout_width="fill_parent"
android:layout_height="fill_parent"
>
<TextView
android:layout_width="fill_parent"
android:layout_height="wrap_content"
android:text="@string/hello"
/>
<TextView
android:id="@+id/orientation"
android:layout_width="fill_parent"
android:layout_height="wrap_content"
/>
</LinearLayout>
相關文章:
- OrientationEventListener(方向事件監聽器)
OrientationEventListener(方向事件監聽器)
OrientationEventListener(方向事件監聽器)是一個當方向發生變化時, 從 SensorManager(傳感器管理程序)接收通知的輔助類.
相關文章:
- Display.getRotation()
package com.AndroidOrientation;
import android.app.Activity;
import android.content.Context;
import android.hardware.SensorManager;
import android.os.Bundle;
import android.view.OrientationEventListener;
import android.widget.TextView;
import android.widget.Toast;
public class AndroidOrientation extends Activity{
TextView orientation;
MyOrientationEventListener myOrientationEventListener;
/** Called when the activity is first created. */
@Override
public void onCreate(Bundle savedInstanceState) {
super.onCreate(savedInstanceState);
setContentView(R.layout.main);
orientation = (TextView)findViewById(R.id.orientation);
myOrientationEventListener =
new MyOrientationEventListener(this, SensorManager.SENSOR_DELAY_NORMAL);
if (myOrientationEventListener.canDetectOrientation()){
myOrientationEventListener.enable();
}else{
Toast.makeText(AndroidOrientation.this,
"Can't Detect Orientation!",
Toast.LENGTH_LONG).show();
}
}
@Override
protected void onDestroy() {
// TODO Auto-generated method stub
super.onDestroy();
myOrientationEventListener.disable();
}
class MyOrientationEventListener extends OrientationEventListener{
public MyOrientationEventListener(Context context, int rate) {
super(context, rate);
// TODO Auto-generated constructor stub
}
@Override
public void onOrientationChanged(int arg0) {
// TODO Auto-generated method stub
orientation.setText(String.valueOf(arg0));
}
}
}
<?xml version="1.0" encoding="utf-8"?>
<LinearLayout xmlns:android="http://schemas.android.com/apk/res/android"
android:orientation="vertical"
android:layout_width="fill_parent"
android:layout_height="fill_parent"
>
<TextView
android:layout_width="fill_parent"
android:layout_height="wrap_content"
android:text="@string/hello"
/>
<TextView
android:id="@+id/orientation"
android:layout_width="fill_parent"
android:layout_height="wrap_content"
/>
</LinearLayout>
相關文章:
- Display.getRotation()
Android 3.1 平台的軟件開發工具包(SDK)
谷歌在Google I/O 2011宣布推出 Android 3.1 平台的軟件開發工具包(SDK)。 Android 3.1是一個漸進的升級版,其依據是在 Android 3.0 平板電腦(tablet)採用的用戶界面和功能。它為用戶和開發人員增加了一些新的功能,其中包括:
詳情,請參閱 Android 3.1 Platform Highlights.
來源
- http://android-developers.blogspot.com/2011/05/android-31-platform-new-sdk-tools.html
- 開放式附件應用程序接口(Open Accessory API)。這個新的API提供了一種 Android應用程式與廣泛配件(如音樂器材,運動設備,機器人系統,等等)之間的整合和互動。
- USB主機應用程序接口(USB host API)。支持USB主機模式,應用程序現在可以管理連接的USB外圍設備,如音頻設備。輸入設備,通信設備,等等。
- 滑鼠,遊戲桿,及遊戲手柄輸入。Android 3.1擴展了輸入事件系統,支持各種新的輸入來源和活動事件,如滑鼠,軌跡球,搖桿,遊戲手柄等。
- 可調整大小的屏幕部件(Home screen widgets)。開發人員現在可以創建可調整水平,垂直尺寸的屏幕部件。
- 當外部連接移除照相機時, 媒體傳輸協議(Media Transfer Protocol, MTP)應用程序現在可以收到通知, 以及在這些設備上管理和存儲文件, 並傳輸文件和元數據。
- 音頻的實時傳輸協議應用程序接口(Real-time Transport Protocol, RTP API)。開發人員可以直接管理按需求或交互式數據流,以啟用網絡電話,一鍵通,會議和音頻流。
詳情,請參閱 Android 3.1 Platform Highlights.
來源
- http://android-developers.blogspot.com/2011/05/android-31-platform-new-sdk-tools.html
2011年5月8日星期日
通過繪圖緩存(DrawingCache)捕獲屏幕顯示
當點擊按鈕, 本應用程序會通過繪圖緩存(DrawingCache)捕獲屏幕顯示, 與顯示在圖像視圖中.
package com.AndroidScreenCapture;
import android.app.Activity;
import android.graphics.Bitmap;
import android.os.Bundle;
import android.view.View;
import android.widget.Button;
import android.widget.ImageView;
public class AndroidScreenCapture extends Activity {
View myscreen;
ImageView viewScreen;
/** Called when the activity is first created. */
@Override
public void onCreate(Bundle savedInstanceState) {
super.onCreate(savedInstanceState);
//setContentView(R.layout.main);
setContentView(R.layout.main);
myscreen = (View)findViewById(R.id.myscreen);
Button buttonCapture = (Button)findViewById(R.id.capture);
viewScreen = (ImageView)findViewById(R.id.screenview);
buttonCapture.setOnClickListener(new Button.OnClickListener(){
@Override
public void onClick(View arg0) {
// TODO Auto-generated method stub
myscreen.setDrawingCacheEnabled(true);
Bitmap bmScreen = myscreen.getDrawingCache();
viewScreen.setImageBitmap(bmScreen);
}});
}
}
<?xml version="1.0" encoding="utf-8"?>
<LinearLayout xmlns:android="http://schemas.android.com/apk/res/android"
android:orientation="vertical"
android:layout_width="fill_parent"
android:layout_height="fill_parent"
android:id="@+id/myscreen"
>
<TextView
android:layout_width="fill_parent"
android:layout_height="wrap_content"
android:text="@string/hello"
/>
<Button
android:id="@+id/capture"
android:layout_width="fill_parent"
android:layout_height="wrap_content"
android:text="Capture Screen!"
/>
<ImageView
android:id="@+id/screenview"
android:layout_width="fill_parent"
android:layout_height="fill_parent"
/>
</LinearLayout>
2011年5月5日星期四
處理語音識別返回的字符串數組列表
從上文"啟動 Android 的語音識別(Speech Recognition)功能"可以注意到所返回的結果是一個字符串數組列表(StringArrayList). 我們可以使用列表視圖(ListView)顯示所有返回的結果, 以供用戶選擇最正確的答案.
package com.AndroidSpeechRecognition;
import java.util.ArrayList;
import android.app.Activity;
import android.content.Intent;
import android.os.Bundle;
import android.speech.RecognizerIntent;
import android.view.View;
import android.widget.AdapterView;
import android.widget.ArrayAdapter;
import android.widget.Button;
import android.widget.ListView;
import android.widget.TextView;
import android.widget.AdapterView.OnItemClickListener;
public class AndroidSpeechRecognition extends Activity {
private static final int RQS_VOICE_RECOGNITION = 1;
TextView textResult;
ListView listResult;
/** Called when the activity is first created. */
@Override
public void onCreate(Bundle savedInstanceState) {
super.onCreate(savedInstanceState);
setContentView(R.layout.main);
Button buttonSpeech = (Button)findViewById(R.id.Speech);
textResult = (TextView)findViewById(R.id.Result);
listResult = (ListView)findViewById(R.id.ResultList);
buttonSpeech.setOnClickListener(new Button.OnClickListener(){
@Override
public void onClick(View arg0) {
// TODO Auto-generated method stub
Intent intent = new Intent(RecognizerIntent.ACTION_RECOGNIZE_SPEECH);
intent.putExtra(RecognizerIntent.EXTRA_LANGUAGE_MODEL,
RecognizerIntent.LANGUAGE_MODEL_FREE_FORM);
intent.putExtra(RecognizerIntent.EXTRA_PROMPT,
"Start Speech");
startActivityForResult(intent, RQS_VOICE_RECOGNITION);
}});
}
@Override
protected void onActivityResult(int requestCode, int resultCode, Intent data) {
// TODO Auto-generated method stub
if(requestCode == RQS_VOICE_RECOGNITION){
if(resultCode == RESULT_OK){
ArrayList<String> result = data.getStringArrayListExtra(RecognizerIntent.EXTRA_RESULTS);
String firstMatch = (String)result.get(0);
textResult.setText(firstMatch);
ArrayAdapter<String> arrayAdapter = new ArrayAdapter<String>(this,
android.R.layout.simple_list_item_1, result);
listResult.setAdapter(arrayAdapter);
listResult.setOnItemClickListener(listResultOnItemClickListener);
}
}
}
private OnItemClickListener listResultOnItemClickListener
= new ListView.OnItemClickListener(){
@Override
public void onItemClick(AdapterView<?> adapter, View view, int position,
long id) {
// TODO Auto-generated method stub
String selectedResult = adapter.getItemAtPosition(position).toString();
textResult.setText(selectedResult);
}};
}
啟動 Android 的語音識別(Speech Recognition)功能
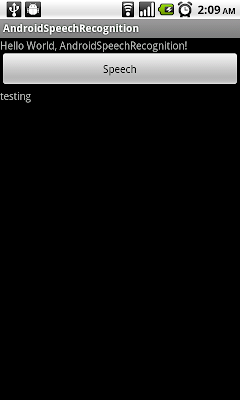
應用軟件可以通過 RecognizerIntent, 啟動 Android 的語音識別(Speech Recognition)功能.
例子:
相關文章:
- 處理語音識別返回的字符串數組列表
例子:
package com.AndroidSpeechRecognition;
import java.util.ArrayList;
import android.app.Activity;
import android.content.Intent;
import android.os.Bundle;
import android.speech.RecognizerIntent;
import android.view.View;
import android.widget.Button;
import android.widget.TextView;
public class AndroidSpeechRecognition extends Activity {
private static final int RQS_VOICE_RECOGNITION = 1;
TextView textResult;
/** Called when the activity is first created. */
@Override
public void onCreate(Bundle savedInstanceState) {
super.onCreate(savedInstanceState);
setContentView(R.layout.main);
Button buttonSpeech = (Button)findViewById(R.id.Speech);
textResult = (TextView)findViewById(R.id.Result);
buttonSpeech.setOnClickListener(new Button.OnClickListener(){
@Override
public void onClick(View arg0) {
// TODO Auto-generated method stub
Intent intent = new Intent(RecognizerIntent.ACTION_RECOGNIZE_SPEECH);
intent.putExtra(RecognizerIntent.EXTRA_LANGUAGE_MODEL,
RecognizerIntent.LANGUAGE_MODEL_FREE_FORM);
intent.putExtra(RecognizerIntent.EXTRA_PROMPT,
"Start Speech");
startActivityForResult(intent, RQS_VOICE_RECOGNITION);
}});
}
@Override
protected void onActivityResult(int requestCode, int resultCode, Intent data) {
// TODO Auto-generated method stub
if(requestCode == RQS_VOICE_RECOGNITION){
if(resultCode == RESULT_OK){
ArrayList<String> result = data.getStringArrayListExtra(RecognizerIntent.EXTRA_RESULTS);
String firstMatch = (String)result.get(0);
textResult.setText(firstMatch);
}
}
}
}
<?xml version="1.0" encoding="utf-8"?>
<LinearLayout xmlns:android="http://schemas.android.com/apk/res/android"
android:orientation="vertical"
android:layout_width="fill_parent"
android:layout_height="fill_parent"
>
<TextView
android:layout_width="fill_parent"
android:layout_height="wrap_content"
android:text="@string/hello"
/>
<Button
android:id="@+id/Speech"
android:layout_width="fill_parent"
android:layout_height="wrap_content"
android:text="Speech"
/>
<TextView
android:id="@+id/Result"
android:layout_width="fill_parent"
android:layout_height="wrap_content"
/>
</LinearLayout>
相關文章:
- 處理語音識別返回的字符串數組列表
訂閱:
文章 (Atom)