
你喜歡HTC手機的板面嗎?
下載HTC Home便可以在Windows Vista 或 Windows 7桌面上體驗HTC.
HTC Home 2是一個時鐘, 天氣預報和動畫的部件(widget). 你可以看雲漂浮在你的桌面上, 雨滴滑落在你的屏幕, 甚至雷擊.

除了HTC Home的風格之外, 它還提供Windows Phone 7的Metro風格.

http://www.htchome.org/
http://androidbiancheng.blogspot.com/


<?xml version="1.0" encoding="utf-8"?>
<LinearLayout xmlns:android="http://schemas.android.com/apk/res/android"
   android:orientation="vertical"
   android:layout_width="fill_parent"
   android:layout_height="fill_parent"
   >
<TextView
   android:layout_width="fill_parent"
   android:layout_height="wrap_content"
   android:text="@string/hello"
   />
<Button
   android:id="@+id/captureimage"
   android:layout_width="fill_parent"
   android:layout_height="wrap_content"
   android:text="Call for ACTION_IMAGE_CAPTURE"
   />
<ImageView
   android:id="@+id/imagecaptured"
   android:layout_width="wrap_content"
   android:layout_height="wrap_content"
   />
</LinearLayout>
package com.AndroidImageCapture;

import android.app.Activity;
import android.content.Intent;
import android.graphics.Bitmap;
import android.os.Bundle;
import android.view.View;
import android.widget.Button;
import android.widget.ImageView;

public class AndroidImageCapture extends Activity {

 ImageView imageiewImageCaptured;

   /** Called when the activity is first created. */
   @Override
   public void onCreate(Bundle savedInstanceState) {
       super.onCreate(savedInstanceState);
       setContentView(R.layout.main);
       Button buttonImageCapture = (Button)findViewById(R.id.captureimage);
       imageiewImageCaptured = (ImageView)findViewById(R.id.imagecaptured);

       buttonImageCapture.setOnClickListener(buttonImageCaptureOnClickListener);
   }

   Button.OnClickListener buttonImageCaptureOnClickListener
   = new Button.OnClickListener(){

  @Override
  public void onClick(View arg0) {
   // TODO Auto-generated method stub
   Intent intent = new Intent(android.provider.MediaStore.ACTION_IMAGE_CAPTURE);
   startActivityForResult(intent, 0);

  }};

 @Override
 protected void onActivityResult(int requestCode, int resultCode, Intent data) {
  // TODO Auto-generated method stub
  super.onActivityResult(requestCode, resultCode, data);

  if (resultCode == RESULT_OK)
  {
   Bundle extras = data.getExtras();
   Bitmap bmp = (Bitmap) extras.get("data");
   imageiewImageCaptured.setImageBitmap(bmp);
  }

 }
}
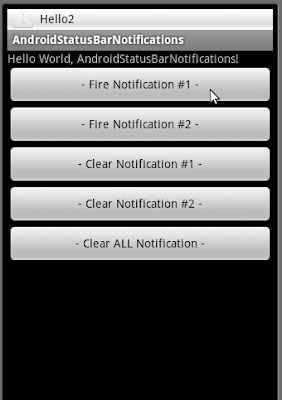
<?xml version="1.0" encoding="utf-8"?>
<LinearLayout xmlns:android="http://schemas.android.com/apk/res/android"
    android:orientation="vertical"
    android:layout_width="fill_parent"
    android:layout_height="fill_parent"
    >
<TextView
    android:layout_width="fill_parent"
    android:layout_height="wrap_content"
    android:text="@string/hello"
    />
<Button
    android:id="@+id/fire1"
    android:layout_width="fill_parent"
    android:layout_height="wrap_content"
    android:text="- Fire Notification #1 -"
    />
<Button
    android:id="@+id/fire2"
    android:layout_width="fill_parent"
    android:layout_height="wrap_content"
    android:text="- Fire Notification #2 -"
    />
<Button
    android:id="@+id/clear1"
    android:layout_width="fill_parent"
    android:layout_height="wrap_content"
    android:text="- Clear Notification #1 -"
    />
<Button
    android:id="@+id/clear2"
    android:layout_width="fill_parent"
    android:layout_height="wrap_content"
    android:text="- Clear Notification #2 -"
    />
<Button
    android:id="@+id/clearall"
    android:layout_width="fill_parent"
    android:layout_height="wrap_content"
    android:text="- Clear ALL Notification -"
    />
</LinearLayout>
package com.AndroidStatusBarNotifications;

import android.app.Activity;
import android.app.Notification;
import android.app.NotificationManager;
import android.app.PendingIntent;
import android.content.Context;
import android.content.Intent;
import android.os.Bundle;
import android.view.View;
import android.view.View.OnClickListener;
import android.widget.Button;

public class AndroidStatusBarNotifications extends Activity {

 private static final int ID_My_Notification_1 = 1;
 private static final int ID_My_Notification_2 = 2;

    /** Called when the activity is first created. */
    @Override
    public void onCreate(Bundle savedInstanceState) {
        super.onCreate(savedInstanceState);
        setContentView(R.layout.main);
        Button buttonFire1 = (Button)findViewById(R.id.fire1);
        Button buttonFire2 = (Button)findViewById(R.id.fire2);
        Button buttonClear1 = (Button)findViewById(R.id.clear1);
        Button buttonClear2 = (Button)findViewById(R.id.clear2);
        Button buttonClearAll = (Button)findViewById(R.id.clearall);
        buttonFire1.setOnClickListener(buttonFire1OnClickListener);
        buttonFire2.setOnClickListener(buttonFire2OnClickListener);
        buttonClear1.setOnClickListener(buttonClear1OnClickListener);
        buttonClear2.setOnClickListener(buttonClear2OnClickListener);
        buttonClearAll.setOnClickListener(buttonClearAllOnClickListener);
    }

    private Button.OnClickListener buttonClearAllOnClickListener
    = new Button.OnClickListener(){

  @Override
  public void onClick(View arg0) {
   // TODO Auto-generated method stub
   String ns = Context.NOTIFICATION_SERVICE;
   NotificationManager mNotificationManager = (NotificationManager)getSystemService(ns);
   mNotificationManager.cancelAll();
  }};

    private Button.OnClickListener buttonClear1OnClickListener
    = new Button.OnClickListener(){

  @Override
  public void onClick(View arg0) {
   // TODO Auto-generated method stub
   clearNotification(ID_My_Notification_1);
  }};

 private Button.OnClickListener buttonClear2OnClickListener
 = new Button.OnClickListener(){

  @Override
  public void onClick(View arg0) {
   // TODO Auto-generated method stub
   clearNotification(ID_My_Notification_2);
  }};

 private void clearNotification(int notification_id){
  String ns = Context.NOTIFICATION_SERVICE;
  NotificationManager mNotificationManager = (NotificationManager)getSystemService(ns);
  mNotificationManager.cancel(notification_id);
 }

    private Button.OnClickListener buttonFire1OnClickListener
    = new Button.OnClickListener(){

  @Override
  public void onClick(View arg0) {
   // TODO Auto-generated method stub
   fireNotification(ID_My_Notification_1);
  }};

 private Button.OnClickListener buttonFire2OnClickListener
 = new Button.OnClickListener(){

  @Override
  public void onClick(View arg0) {
   // TODO Auto-generated method stub
   fireNotification(ID_My_Notification_2);
  }};

 private void fireNotification(int notification_id){
   //Get a reference to the NotificationManager
   String ns = Context.NOTIFICATION_SERVICE;
   NotificationManager mNotificationManager = (NotificationManager)getSystemService(ns);

   //Instantiate the Notification
   int icon = android.R.drawable.ic_dialog_alert;
   CharSequence tickerText = "Hello" + String.valueOf(notification_id);
   long when = System.currentTimeMillis();

   Notification notification = new Notification(icon, tickerText, when);

   //Define the Notification's expanded message and Intent
   Context context = getApplicationContext();
   CharSequence contentTitle = "My Notification" + String.valueOf(notification_id);
   CharSequence contentText = "Hello My Notification!" + String.valueOf(notification_id);
   //Intent notificationIntent = new Intent(AndroidStatusBarNotifications.this, AndroidStatusBarNotifications.class);
   Intent notificationIntent = new Intent(getBaseContext(), AndroidStatusBarNotifications.class);
   PendingIntent contentIntent = PendingIntent.getActivity(AndroidStatusBarNotifications.this, 0, notificationIntent, 0);

   notification.setLatestEventInfo(context, contentTitle, contentText, contentIntent);

   //Pass the Notification to the NotificationManager
   mNotificationManager.notify(notification_id, notification);

  }
}


<?xml version="1.0" encoding="utf-8"?>
<LinearLayout xmlns:android="http://schemas.android.com/apk/res/android"
    android:orientation="vertical"
    android:layout_width="fill_parent"
    android:layout_height="fill_parent"
    >
<TextView
    android:layout_width="fill_parent"
    android:layout_height="wrap_content"
    android:text="@string/hello"
    />
<Button
    android:id="@+id/fire"
    android:layout_width="fill_parent"
    android:layout_height="wrap_content"
    android:text="- Fire Notification -"
    />
</LinearLayout>
package com.AndroidStatusBarNotifications;

import android.app.Activity;
import android.app.Notification;
import android.app.NotificationManager;
import android.app.PendingIntent;
import android.content.Context;
import android.content.Intent;
import android.os.Bundle;
import android.view.View;
import android.widget.Button;

public class AndroidStatusBarNotifications extends Activity {

 private static final int ID_My_Notification = 1;

    /** Called when the activity is first created. */
    @Override
    public void onCreate(Bundle savedInstanceState) {
        super.onCreate(savedInstanceState);
        setContentView(R.layout.main);
        Button buttonFire = (Button)findViewById(R.id.fire);
        buttonFire.setOnClickListener(buttonFireOnClickListener);
    }

    private Button.OnClickListener buttonFireOnClickListener
    = new Button.OnClickListener(){

  @Override
  public void onClick(View arg0) {
   // TODO Auto-generated method stub

   //Get a reference to the NotificationManager
   String ns = Context.NOTIFICATION_SERVICE;
   NotificationManager mNotificationManager = (NotificationManager) getSystemService(ns);

   //Instantiate the Notification
   int icon = android.R.drawable.ic_dialog_alert;
   CharSequence tickerText = "Hello";
   long when = System.currentTimeMillis();

   Notification notification = new Notification(icon, tickerText, when);

   //Define the Notification's expanded message and Intent
   Context context = getApplicationContext();
   CharSequence contentTitle = "My Notification";
   CharSequence contentText = "Hello My Notification!";
   //Intent notificationIntent = new Intent(AndroidStatusBarNotifications.this, AndroidStatusBarNotifications.class);
   Intent notificationIntent = new Intent(getBaseContext(), AndroidStatusBarNotifications.class);
   PendingIntent contentIntent = PendingIntent.getActivity(AndroidStatusBarNotifications.this, 0, notificationIntent, 0);

   notification.setLatestEventInfo(context, contentTitle, contentText, contentIntent);

   //Pass the Notification to the NotificationManager
   mNotificationManager.notify(ID_My_Notification, notification);

  }};
}

<?xml version="1.0" encoding="utf-8"?>
<LinearLayout xmlns:android="http://schemas.android.com/apk/res/android"
    android:orientation="vertical"
    android:layout_width="fill_parent"
    android:layout_height="fill_parent"
    >
<TextView
    android:layout_width="fill_parent"
    android:layout_height="wrap_content"
    android:text="@string/hello"
    />
<Button
    android:id="@+id/start"
    android:layout_width="fill_parent"
    android:layout_height="wrap_content"
    android:text="- Start -"
    />
</LinearLayout>
package com.AndroidProgressDialog;

import android.app.Activity;
import android.app.ProgressDialog;
import android.os.AsyncTask;
import android.os.Bundle;
import android.os.SystemClock;
import android.view.View;
import android.widget.Button;

public class AndroidProgressDialog extends Activity {

    /** Called when the activity is first created. */
    @Override
    public void onCreate(Bundle savedInstanceState) {
        super.onCreate(savedInstanceState);
        setContentView(R.layout.main);
        Button buttonStart = (Button)findViewById(R.id.start);

        buttonStart.setOnClickListener(new Button.OnClickListener(){

   @Override
   public void onClick(View arg0) {
    // TODO Auto-generated method stub
    new asyncTaskUpdateProgress().execute();
   }

        });

    }

    public class asyncTaskUpdateProgress extends AsyncTask<Void, Integer, Void> {

     int progress;
     ProgressDialog progressDialog;

  @Override
  protected void onPostExecute(Void result) {
   // TODO Auto-generated method stub
   progressDialog.dismiss();
  }

  @Override
  protected void onPreExecute() {
   // TODO Auto-generated method stub
   progress = 0;
   progressDialog = ProgressDialog.show(AndroidProgressDialog.this, "ProgressDialog", "Wait!");
  }

  @Override
  protected Void doInBackground(Void... arg0) {
   // TODO Auto-generated method stub
   while(progress<100){
    progress++;
    SystemClock.sleep(20);
   }
   return null;
  }
    }
}


<?xml version="1.0" encoding="utf-8"?>
<manifest xmlns:android="http://schemas.android.com/apk/res/android"
     package="com.AndroidTakePicture"
     android:versionCode="1"
     android:versionName="1.0">
   <application android:icon="@drawable/icon" android:label="@string/app_name">
       <activity android:name=".AndroidTakePicture"
                 android:label="@string/app_name"
                 android:screenOrientation="portrait"
                 >
           <intent-filter>
               <action android:name="android.intent.action.MAIN" />
               <category android:name="android.intent.category.LAUNCHER" />
           </intent-filter>
       </activity>

   </application>
   <uses-sdk android:minSdkVersion="7" />
<uses-permission android:name="android.permission.CAMERA"></uses-permission>
</manifest>
<?xml version="1.0" encoding="utf-8"?>
<LinearLayout xmlns:android="http://schemas.android.com/apk/res/android"
   android:orientation="vertical"
   android:layout_width="fill_parent"
   android:layout_height="fill_parent"
   >
<TextView
   android:layout_width="fill_parent"
   android:layout_height="wrap_content"
   android:text="@string/hello"
   />
<Button
   android:id="@+id/takebutton"
   android:layout_width="fill_parent"
   android:layout_height="wrap_content"
   android:text="- Take Picture -"
   />
<SurfaceView
android:id="@+id/previewsurface"
android:layout_width="fill_parent"
android:layout_height="wrap_content"
/>
</LinearLayout>
package com.AndroidTakePicture;

import java.io.IOException;

import android.app.Activity;
import android.graphics.Bitmap;
import android.graphics.BitmapFactory;
import android.graphics.PixelFormat;
import android.hardware.Camera;
import android.hardware.Camera.PictureCallback;
import android.hardware.Camera.ShutterCallback;
import android.os.Bundle;
import android.view.SurfaceHolder;
import android.view.SurfaceView;
import android.view.View;
import android.widget.Button;

public class AndroidTakePicture extends Activity implements SurfaceHolder.Callback{

Camera myCamera;
SurfaceView previewSurfaceView;
SurfaceHolder previewSurfaceHolder;
boolean previewing = false;

   /** Called when the activity is first created. */
   @Override
   public void onCreate(Bundle savedInstanceState) {
       super.onCreate(savedInstanceState);
       setContentView(R.layout.main);

       getWindow().setFormat(PixelFormat.UNKNOWN);
       previewSurfaceView = (SurfaceView)findViewById(R.id.previewsurface);
       previewSurfaceHolder = previewSurfaceView.getHolder();
       previewSurfaceHolder.addCallback(this);
       previewSurfaceHolder.setType(SurfaceHolder.SURFACE_TYPE_PUSH_BUFFERS);

       Button buttonTakePicture = (Button)findViewById(R.id.takebutton);
       buttonTakePicture.setOnClickListener(new Button.OnClickListener(){

  @Override
  public void onClick(View arg0) {
   // TODO Auto-generated method stub
   myCamera.takePicture(shutterCallback, rawPictureCallback, jpegPictureCallback);
  }});
   }

   ShutterCallback shutterCallback = new ShutterCallback(){

 @Override
 public void onShutter() {
  // TODO Auto-generated method stub

 }};

PictureCallback rawPictureCallback = new PictureCallback(){

 @Override
 public void onPictureTaken(byte[] arg0, Camera arg1) {
  // TODO Auto-generated method stub

 }};

PictureCallback jpegPictureCallback = new PictureCallback(){

  @Override
  public void onPictureTaken(byte[] arg0, Camera arg1) {
   // TODO Auto-generated method stub
   Bitmap bitmapPicture = BitmapFactory.decodeByteArray(arg0, 0, arg0.length);

  }};

@Override
public void surfaceChanged(SurfaceHolder arg0, int arg1, int arg2, int arg3) {
 // TODO Auto-generated method stub

 if(previewing){
  myCamera.stopPreview();
  previewing = false;
 }


 try {
  myCamera.setPreviewDisplay(arg0);
  myCamera.startPreview();
  previewing = true;
 } catch (IOException e) {
  // TODO Auto-generated catch block
  e.printStackTrace();
 }


}

@Override
public void surfaceCreated(SurfaceHolder arg0) {
 // TODO Auto-generated method stub
 myCamera = Camera.open();
}

@Override
public void surfaceDestroyed(SurfaceHolder arg0) {
 // TODO Auto-generated method stub
 myCamera.stopPreview();
 myCamera.release();
 myCamera = null;
 previewing = false;
}
}

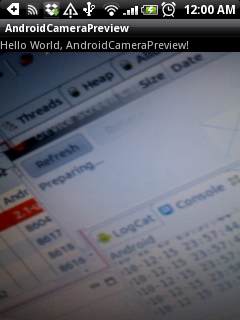
<?xml version="1.0" encoding="utf-8"?>
<manifest xmlns:android="http://schemas.android.com/apk/res/android"
      package="com.AndroidCameraPreview"
      android:versionCode="1"
      android:versionName="1.0">
    <application android:icon="@drawable/icon" android:label="@string/app_name">
        <activity android:name=".AndroidCameraPreview"
                  android:label="@string/app_name">
            <intent-filter>
                <action android:name="android.intent.action.MAIN" />
                <category android:name="android.intent.category.LAUNCHER" />
            </intent-filter>
        </activity>

    </application>
    <uses-sdk android:minSdkVersion="7" />
    <uses-permission android:name="android.permission.CAMERA"></uses-permission>
</manifest>
<?xml version="1.0" encoding="utf-8"?>
<LinearLayout xmlns:android="http://schemas.android.com/apk/res/android"
    android:orientation="vertical"
    android:layout_width="fill_parent"
    android:layout_height="fill_parent"
    >
<TextView
    android:layout_width="fill_parent"
    android:layout_height="wrap_content"
    android:text="@string/hello"
    />
<SurfaceView
    android:id="@+id/previewsurface"
    android:layout_width="fill_parent"
    android:layout_height="wrap_content"
    />
</LinearLayout>
package com.AndroidCameraPreview;

import java.io.IOException;

import android.app.Activity;
import android.graphics.PixelFormat;
import android.hardware.Camera;
import android.os.Bundle;
import android.view.SurfaceHolder;
import android.view.SurfaceView;

public class AndroidCameraPreview extends Activity implements SurfaceHolder.Callback{

 Camera myCamera;
 SurfaceView previewSurfaceView;
 SurfaceHolder previewSurfaceHolder;
 boolean previewing = false;

    /** Called when the activity is first created. */
    @Override
    public void onCreate(Bundle savedInstanceState) {
        super.onCreate(savedInstanceState);
        setContentView(R.layout.main);

        getWindow().setFormat(PixelFormat.UNKNOWN);
        previewSurfaceView = (SurfaceView)findViewById(R.id.previewsurface);
        previewSurfaceHolder = previewSurfaceView.getHolder();
        previewSurfaceHolder.addCallback(this);
        previewSurfaceHolder.setType(SurfaceHolder.SURFACE_TYPE_PUSH_BUFFERS);
    }

 @Override
 public void surfaceChanged(SurfaceHolder arg0, int arg1, int arg2, int arg3) {
  // TODO Auto-generated method stub

  if(previewing){
   myCamera.stopPreview();
   previewing = false;
  }


  try {
   myCamera.setPreviewDisplay(arg0);
   myCamera.startPreview();
   previewing = true;
  } catch (IOException e) {
   // TODO Auto-generated catch block
   e.printStackTrace();
  }


 }

 @Override
 public void surfaceCreated(SurfaceHolder arg0) {
  // TODO Auto-generated method stub
  myCamera = Camera.open();
 }

 @Override
 public void surfaceDestroyed(SurfaceHolder arg0) {
  // TODO Auto-generated method stub
  myCamera.stopPreview();
  myCamera.release();
  myCamera = null;
  previewing = false;
 }
}


package com.AndroidLog;

import android.app.Activity;
import android.os.Bundle;
import android.util.Log;

public class AndroidLog extends Activity {

 private static final String TAG = "AndroidLog";

    /** Called when the activity is first created. */
    @Override
    public void onCreate(Bundle savedInstanceState) {
        super.onCreate(savedInstanceState);
        setContentView(R.layout.main);

        Log.i(TAG, "onCreate");

    }

 @Override
 protected void onDestroy() {
  // TODO Auto-generated method stub
  super.onDestroy();
  Log.i(TAG, "onPause()");
 }

 @Override
 protected void onPause() {
  // TODO Auto-generated method stub
  super.onPause();
  Log.i(TAG, "onPause()");
 }

 @Override
 protected void onRestart() {
  // TODO Auto-generated method stub
  super.onRestart();
  Log.i(TAG, "onRestart()");
 }

 @Override
 protected void onResume() {
  // TODO Auto-generated method stub
  super.onResume();
  Log.i(TAG, "onResume()");
 }

 @Override
 protected void onStart() {
  // TODO Auto-generated method stub
  super.onStart();
  Log.i(TAG, "onStart()");
 }

 @Override
 protected void onStop() {
  // TODO Auto-generated method stub
  super.onStop();
  Log.i(TAG, "onStop()");
 }
}


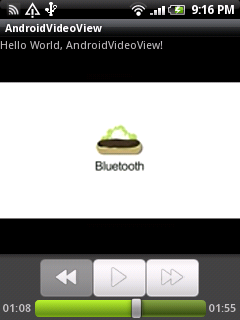
<?xml version="1.0" encoding="utf-8"?>
<LinearLayout xmlns:android="http://schemas.android.com/apk/res/android"
   android:orientation="vertical"
   android:layout_width="fill_parent"
   android:layout_height="fill_parent"
   >
<TextView
   android:layout_width="fill_parent"
   android:layout_height="wrap_content"
   android:text="@string/hello"
   />
<VideoView
   android:id="@+id/video"
   android:layout_width="fill_parent"
   android:layout_height="wrap_content"
   />
</LinearLayout>
package com.AndroidVideoView;

import android.app.Activity;
import android.net.Uri;
import android.os.Bundle;
import android.widget.MediaController;
import android.widget.VideoView;

public class AndroidVideoView extends Activity {
   /** Called when the activity is first created. */
   @Override
   public void onCreate(Bundle savedInstanceState) {
       super.onCreate(savedInstanceState);
       setContentView(R.layout.main);

       VideoView videoView = (VideoView)findViewById(R.id.video);

       String src = "rtsp://v2.cache2.c.youtube.com/CjYLENy73wIaLQm3JbT_9HqWohMYESARFEIJbXYtZ29vZ2xlSARSBXdhdGNoYIvJo6nmx9DvSww=/0/0/0/video.3gp";
       videoView.setVideoURI(Uri.parse(src));
       videoView.setMediaController(new MediaController(this));
       videoView.requestFocus();
       videoView.start();
   }
}


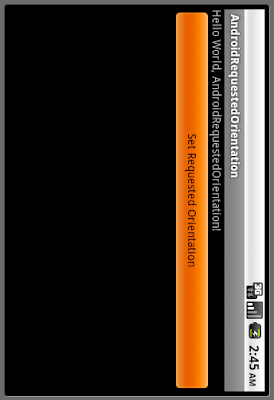
<?xml version="1.0" encoding="utf-8"?>
<LinearLayout xmlns:android="http://schemas.android.com/apk/res/android"
   android:orientation="vertical"
   android:layout_width="fill_parent"
   android:layout_height="fill_parent"
   >
<TextView
   android:layout_width="fill_parent"
   android:layout_height="wrap_content"
   android:text="@string/hello"
   />
<Button
   android:id="@+id/setrequestedorientation"
   android:layout_width="fill_parent"
   android:layout_height="wrap_content"
   android:text="Set Requested Orientation"
   />
</LinearLayout>
package com.AndroidRequestedOrientation;

import android.app.ListActivity;
import android.content.Intent;
import android.content.pm.ActivityInfo;
import android.os.Bundle;
import android.view.View;
import android.widget.ArrayAdapter;
import android.widget.ListView;

public class SetRequestedOrientationActivity extends ListActivity {

 @Override
 protected void onCreate(Bundle savedInstanceState) {
  // TODO Auto-generated method stub
  super.onCreate(savedInstanceState);

  setListAdapter(new ArrayAdapter<String>(this,
    android.R.layout.simple_list_item_1, OrientationString));
  getListView().setTextFilterEnabled(true);
 }

 static final String[] OrientationString = new String[] {
  "SCREEN_ORIENTATION_UNSPECIFIED",
  "SCREEN_ORIENTATION_LANDSCAPE",
  "SCREEN_ORIENTATION_PORTRAIT",
  "SCREEN_ORIENTATION_USER",
  "SCREEN_ORIENTATION_BEHIND",
  "SCREEN_ORIENTATION_SENSOR",
  "SCREEN_ORIENTATION_NOSENSOR"
 };

 static final int[] OrientationSetting = new int[] {
  ActivityInfo.SCREEN_ORIENTATION_UNSPECIFIED,
  ActivityInfo.SCREEN_ORIENTATION_LANDSCAPE,
  ActivityInfo.SCREEN_ORIENTATION_PORTRAIT,
  ActivityInfo.SCREEN_ORIENTATION_USER,
  ActivityInfo.SCREEN_ORIENTATION_BEHIND,
  ActivityInfo.SCREEN_ORIENTATION_SENSOR,
  ActivityInfo.SCREEN_ORIENTATION_NOSENSOR
 };

 @Override
 protected void onListItemClick(ListView l, View v, int position, long id) {
  // TODO Auto-generated method stub
  super.onListItemClick(l, v, position, id);

  Intent intent = new Intent();
     Bundle bundle = new Bundle();

     bundle.putInt("setting", OrientationSetting[position]);
     intent.putExtras(bundle);
     setResult(RESULT_OK, intent);
     finish();
 }

}
package com.AndroidRequestedOrientation;

import android.app.Activity;
import android.content.Intent;
import android.content.pm.ActivityInfo;
import android.os.Bundle;
import android.view.View;
import android.widget.Button;

public class AndroidRequestedOrientation extends Activity {
   /** Called when the activity is first created. */
   @Override
   public void onCreate(Bundle savedInstanceState) {
       super.onCreate(savedInstanceState);
       setContentView(R.layout.main);
       Button buttonSetRequestedOrientation = (Button)findViewById(R.id.setrequestedorientation);
       buttonSetRequestedOrientation.setOnClickListener(new Button.OnClickListener(){

   @Override
   public void onClick(View v) {
    // TODO Auto-generated method stub
    Intent intent = new Intent();
    intent.setClass(AndroidRequestedOrientation.this,
      SetRequestedOrientationActivity.class);

    startActivityForResult(intent, 0);
   }});
   }

 @Override
 protected void onActivityResult(int requestCode, int resultCode, Intent data) {
  // TODO Auto-generated method stub
  super.onActivityResult(requestCode, resultCode, data);

  if (requestCode==0)
  {
   if(resultCode == RESULT_OK){
    int OrientationSetting = data.getIntExtra("setting",
      ActivityInfo.SCREEN_ORIENTATION_UNSPECIFIED);
    setRequestedOrientation(OrientationSetting);
   }
  }
 }
}
<?xml version="1.0" encoding="utf-8"?>
<manifest xmlns:android="http://schemas.android.com/apk/res/android"
     package="com.AndroidRequestedOrientation"
     android:versionCode="1"
     android:versionName="1.0">
   <application android:icon="@drawable/icon" android:label="@string/app_name">
       <activity android:name=".AndroidRequestedOrientation"
                 android:label="@string/app_name">
           <intent-filter>
               <action android:name="android.intent.action.MAIN" />
               <category android:name="android.intent.category.LAUNCHER" />
           </intent-filter>
       </activity>
  <activity android:name=".SetRequestedOrientationActivity"></activity>
   </application>
   <uses-sdk android:minSdkVersion="4" />

</manifest>
<activity android:name=".MyActivity"
                android:label="@string/app_name"
                android:screenOrientation="portrait">


<?xml version="1.0" encoding="utf-8"?>
<LinearLayout xmlns:android="http://schemas.android.com/apk/res/android"
  android:orientation="vertical"
  android:layout_width="fill_parent"
  android:layout_height="fill_parent"
  >
<TextView
  android:layout_width="fill_parent"
  android:layout_height="wrap_content"
  android:text="@string/hello"
  />
<EditText
  android:id="@+id/input"
  android:layout_width="fill_parent"
  android:layout_height="wrap_content"
  />
<Button
  android:id="@+id/write"
  android:layout_width="fill_parent"
  android:layout_height="wrap_content"
  android:text="Write"
  />
<Button
  android:id="@+id/read"
  android:layout_width="fill_parent"
  android:layout_height="wrap_content"
  android:text="Read"
  />
<TextView
  android:id="@+id/output"
  android:layout_width="fill_parent"
  android:layout_height="wrap_content"
  />
</LinearLayout>
package com.AndroidInternalStorage;

import java.io.FileInputStream;
import java.io.FileNotFoundException;
import java.io.FileOutputStream;
import java.io.IOException;

import android.app.Activity;
import android.content.Context;
import android.os.Bundle;
import android.view.View;
import android.widget.Button;
import android.widget.EditText;
import android.widget.TextView;

public class AndroidInternalStorage extends Activity {

String FILENAME = "MyFile";

EditText edittextInput;
TextView textviewOutput;

  /** Called when the activity is first created. */
  @Override
  public void onCreate(Bundle savedInstanceState) {
      super.onCreate(savedInstanceState);
      setContentView(R.layout.main);
      edittextInput = (EditText)findViewById(R.id.input);
      Button buttonWrite = (Button)findViewById(R.id.write);
      Button buttonRead = (Button)findViewById(R.id.read);
      textviewOutput = (TextView)findViewById(R.id.output);

      buttonWrite.setOnClickListener(buttonWriteOnClickListener);
      buttonRead.setOnClickListener(buttonReadOnClickListener);
  }

  private Button.OnClickListener buttonWriteOnClickListener
  = new Button.OnClickListener(){

 @Override
 public void onClick(View v) {
  // TODO Auto-generated method stub

  String string = edittextInput.getText().toString();

  FileOutputStream fos;
  try {
   fos = openFileOutput(FILENAME, Context.MODE_PRIVATE);
   fos.write(string.getBytes());
   fos.close();
  } catch (FileNotFoundException e) {
   // TODO Auto-generated catch block
   e.printStackTrace();
  } catch (IOException e) {
   // TODO Auto-generated catch block
   e.printStackTrace();
  }


 }};

  private Button.OnClickListener buttonReadOnClickListener
  = new Button.OnClickListener(){

 @Override
 public void onClick(View v) {
  // TODO Auto-generated method stub

  FileInputStream fis;
  try {
   fis = openFileInput(FILENAME);
   byte[] input = new byte[fis.available()];
   while (fis.read(input) != -1) {}
   textviewOutput.setText(new String(input));
  } catch (FileNotFoundException e) {
   // TODO Auto-generated catch block
   e.printStackTrace();
  } catch (IOException e) {
   // TODO Auto-generated catch block
   e.printStackTrace();
  }


 }};
}
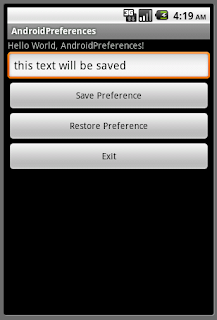
<?xml version="1.0" encoding="utf-8"?>
<LinearLayout xmlns:android="http://schemas.android.com/apk/res/android"
   android:orientation="vertical"
   android:layout_width="fill_parent"
   android:layout_height="fill_parent"
   >
<TextView
   android:layout_width="fill_parent"
   android:layout_height="wrap_content"
   android:text="@string/hello"
   />
<EditText
   android:id="@+id/preferencestring"
   android:layout_width="fill_parent"
   android:layout_height="wrap_content"
   />
<Button
   android:id="@+id/savepreference"
   android:layout_width="fill_parent"
   android:layout_height="wrap_content"
   android:text="Save Preference"
   />
<Button
   android:id="@+id/restorepreference"
   android:layout_width="fill_parent"
   android:layout_height="wrap_content"
   android:text="Restore Preference"
   />
<Button
   android:id="@+id/exit"
   android:layout_width="fill_parent"
   android:layout_height="wrap_content"
   android:text="Exit"
   />
</LinearLayout>
package com.AndroidPreferences;

import android.app.Activity;
import android.content.SharedPreferences;
import android.os.Bundle;
import android.view.View;
import android.widget.Button;
import android.widget.EditText;

public class AndroidPreferences extends Activity {

 EditText myText;

   /** Called when the activity is first created. */
   @Override
   public void onCreate(Bundle savedInstanceState) {
       super.onCreate(savedInstanceState);
       setContentView(R.layout.main);

       myText = (EditText)findViewById(R.id.preferencestring);
       Button buttonSave = (Button)findViewById(R.id.savepreference);
       Button buttonRestore = (Button)findViewById(R.id.restorepreference);
       Button buttonExit = (Button)findViewById(R.id.exit);

       buttonSave.setOnClickListener(buttonSaveOnClickListener);
       buttonRestore.setOnClickListener(buttonRestoreOnClickListener);
       buttonExit.setOnClickListener(buttonExitOnClickListener);

       SharedPreferences myPreferences = getPreferences(0);
       String myPreferencesString = myPreferences.getString("key", "default value");

       myText.setText(myPreferencesString);

   }

   private Button.OnClickListener buttonSaveOnClickListener
    = new Button.OnClickListener(){

   @Override
   public void onClick(View v) {
    // TODO Auto-generated method stub

    SharedPreferences settings = getPreferences(0);
    SharedPreferences.Editor editor = settings.edit();
    editor.putString("key", myText.getText().toString());
    editor.commit();

   }};

 private Button.OnClickListener buttonRestoreOnClickListener
  = new Button.OnClickListener(){

   @Override
   public void onClick(View v) {
    // TODO Auto-generated method stub
          SharedPreferences myPreferences = getPreferences(0);
          String myPreferencesString = myPreferences.getString("key", "default value");

          myText.setText(myPreferencesString);
   }};

 private Button.OnClickListener buttonExitOnClickListener
     = new Button.OnClickListener(){

   @Override
   public void onClick(View v) {
    // TODO Auto-generated method stub
    finish();
   }};

}


<?xml version="1.0" encoding="utf-8"?>
<LinearLayout xmlns:android="http://schemas.android.com/apk/res/android"
  android:orientation="vertical"
  android:layout_width="fill_parent"
  android:layout_height="fill_parent"
  >
<TextView
  android:layout_width="fill_parent"
  android:layout_height="wrap_content"
  android:text="@string/hello"
  />
<TextView
  android:layout_width="fill_parent"
  android:layout_height="wrap_content"
  android:text="Very simple code to copy a picture from the application's resource into the external file"
  />
<TextView
  android:id="@+id/info"
  android:layout_width="fill_parent"
  android:layout_height="wrap_content"
  />
</LinearLayout>
package com.AndroidExternalFiles;

import java.io.File;
import java.io.FileOutputStream;
import java.io.IOException;
import java.io.InputStream;
import java.io.OutputStream;

import android.app.Activity;
import android.os.Bundle;
import android.os.Environment;
import android.widget.TextView;

public class AndroidExternalFiles extends Activity {

TextView textInfo;

  /** Called when the activity is first created. */
  @Override
  public void onCreate(Bundle savedInstanceState) {
      super.onCreate(savedInstanceState);
      setContentView(R.layout.main);
      textInfo = (TextView)findViewById(R.id.info);

      String state = Environment.getExternalStorageState();

      if (Environment.MEDIA_MOUNTED.equals(state)) {
       createExternalStoragePrivateFile();
      } else if (Environment.MEDIA_MOUNTED_READ_ONLY.equals(state)) {
       textInfo.setText("The media is Read Only!");
      } else {
       textInfo.setText("Something Wrong!");
      }
  }

  void createExternalStoragePrivateFile() {
      // Create a path where we will place our private file on external
      // storage.
      File file = new File(getExternalFilesDir(null), "myFile.jpg");

      try {
          // Very simple code to copy a picture from the application's
          // resource into the external file.
          InputStream is = getResources().openRawResource(R.drawable.icon);
          OutputStream os = new FileOutputStream(file);
          byte[] data = new byte[is.available()];
          is.read(data);
          os.write(data);
          is.close();
          os.close();
          textInfo.setText("File have been wrote.");
      } catch (IOException e) {
          // Unable to create file, likely because external storage is
          // not currently mounted.
       textInfo.setText("IOException: " + e.toString());
      }
  }
}
<?xml version="1.0" encoding="utf-8"?>
<manifest xmlns:android="http://schemas.android.com/apk/res/android"
    package="com.AndroidExternalFiles"
    android:versionCode="1"
    android:versionName="1.0">
  <application android:icon="@drawable/icon" android:label="@string/app_name">
      <activity android:name=".AndroidExternalFiles"
                android:label="@string/app_name">
          <intent-filter>
              <action android:name="android.intent.action.MAIN" />
              <category android:name="android.intent.category.LAUNCHER" />
          </intent-filter>
      </activity>

  </application>
  <uses-sdk android:minSdkVersion="8" />
  <uses-permission android:name="android.permission.WRITE_EXTERNAL_STORAGE" />
</manifest>
<?xml version="1.0" encoding="utf-8"?>
<LinearLayout xmlns:android="http://schemas.android.com/apk/res/android"
   android:orientation="vertical"
   android:layout_width="fill_parent"
   android:layout_height="fill_parent"
   >
<TextView
   android:layout_width="fill_parent"
   android:layout_height="wrap_content"
   android:text="@string/hello"
   />
<TextView
   android:id="@+id/info"
   android:layout_width="fill_parent"
   android:layout_height="wrap_content"
   />
<TextView
   android:id="@+id/textx"
   android:layout_width="fill_parent"
   android:layout_height="wrap_content"
   android:text="X: "
   />
<TextView
   android:id="@+id/texty"
   android:layout_width="fill_parent"
   android:layout_height="wrap_content"
   android:text="Y: "
   />
<TextView
   android:id="@+id/textz"
   android:layout_width="fill_parent"
   android:layout_height="wrap_content"
   android:text="Z: "
   />
</LinearLayout>
package com.AndroidOrientationInfo;

import java.util.List;

import android.app.Activity;
import android.content.Context;
import android.hardware.Sensor;
import android.hardware.SensorEvent;
import android.hardware.SensorEventListener;
import android.hardware.SensorManager;
import android.os.Bundle;
import android.widget.TextView;
import android.widget.Toast;

public class AndroidOrientationInfo extends Activity {

 SensorManager sensorManager;
 boolean accelerometerPresent;
 Sensor accelerometerSensor;

 TextView textInfo, textX, textY, textZ;

   /** Called when the activity is first created. */
   @Override
   public void onCreate(Bundle savedInstanceState) {
       super.onCreate(savedInstanceState);
       setContentView(R.layout.main);

       textInfo = (TextView)findViewById(R.id.info);
       textX = (TextView)findViewById(R.id.textx);
       textY = (TextView)findViewById(R.id.texty);
       textZ = (TextView)findViewById(R.id.textz);

       sensorManager = (SensorManager)getSystemService(Context.SENSOR_SERVICE);
       List<Sensor> sensorList = sensorManager.getSensorList(Sensor.TYPE_ORIENTATION);

       if(sensorList.size() > 0){
        accelerometerPresent = true;
        accelerometerSensor = sensorList.get(0);

        String strSensor  = "Name: " + accelerometerSensor.getName()
         + "\nVersion: " + String.valueOf(accelerometerSensor.getVersion())
         + "\nVendor: " + accelerometerSensor.getVendor()
         + "\nType: " + String.valueOf(accelerometerSensor.getType())
         + "\nMax: " + String.valueOf(accelerometerSensor.getMaximumRange())
         + "\nResolution: " + String.valueOf(accelerometerSensor.getResolution())
         + "\nPower: " + String.valueOf(accelerometerSensor.getPower())
         + "\nClass: " + accelerometerSensor.getClass().toString();
        textInfo.setText(strSensor);
       }
       else{
        accelerometerPresent = false;
       }

   }

 @Override
 protected void onResume() {
  // TODO Auto-generated method stub
  super.onResume();

  if(accelerometerPresent){
   sensorManager.registerListener(accelerometerListener, accelerometerSensor, SensorManager.SENSOR_DELAY_NORMAL);
   Toast.makeText(this, "Register accelerometerListener", Toast.LENGTH_LONG).show();
  }
 }

 @Override
 protected void onStop() {
  // TODO Auto-generated method stub
  super.onStop();

  if(accelerometerPresent){
   sensorManager.unregisterListener(accelerometerListener);
   Toast.makeText(this, "Unregister accelerometerListener", Toast.LENGTH_LONG).show();
  }
 }

 private SensorEventListener accelerometerListener = new SensorEventListener(){

  @Override
  public void onAccuracyChanged(Sensor arg0, int arg1) {
   // TODO Auto-generated method stub

  }

  @Override
  public void onSensorChanged(SensorEvent event) {
   // TODO Auto-generated method stub
   textX.setText("X: " + String.valueOf(event.values[0]));
   textY.setText("Y: " + String.valueOf(event.values[1]));
   textZ.setText("Z: " + String.valueOf(event.values[2]));
  }};
}

<?xml version="1.0" encoding="utf-8"?>
<LinearLayout xmlns:android="http://schemas.android.com/apk/res/android"
  android:orientation="vertical"
  android:layout_width="fill_parent"
  android:layout_height="fill_parent"
  >
<TextView
  android:layout_width="fill_parent"
  android:layout_height="wrap_content"
  android:text="@string/hello"
  />
<TextView
  android:id="@+id/info"
  android:layout_width="fill_parent"
  android:layout_height="wrap_content"
  />
<TextView
  android:id="@+id/textx"
  android:layout_width="fill_parent"
  android:layout_height="wrap_content"
  android:text="X: "
  />
<TextView
  android:id="@+id/texty"
  android:layout_width="fill_parent"
  android:layout_height="wrap_content"
  android:text="Y: "
  />
<TextView
  android:id="@+id/textz"
  android:layout_width="fill_parent"
  android:layout_height="wrap_content"
  android:text="Z: "
  />
</LinearLayout>
package com.AndroidAccelerometer;

import java.util.List;

import android.app.Activity;
import android.content.Context;
import android.hardware.Sensor;
import android.hardware.SensorEvent;
import android.hardware.SensorEventListener;
import android.hardware.SensorManager;
import android.os.Bundle;
import android.widget.TextView;
import android.widget.Toast;

public class AndroidAccelerometer extends Activity {

SensorManager sensorManager;
boolean accelerometerPresent;
Sensor accelerometerSensor;

TextView textInfo, textX, textY, textZ;

  /** Called when the activity is first created. */
  @Override
  public void onCreate(Bundle savedInstanceState) {
      super.onCreate(savedInstanceState);
      setContentView(R.layout.main);

      textInfo = (TextView)findViewById(R.id.info);
      textX = (TextView)findViewById(R.id.textx);
      textY = (TextView)findViewById(R.id.texty);
      textZ = (TextView)findViewById(R.id.textz);

      sensorManager = (SensorManager)getSystemService(Context.SENSOR_SERVICE);
      List<Sensor> sensorList = sensorManager.getSensorList(Sensor.TYPE_ACCELEROMETER);

      if(sensorList.size() > 0){
       accelerometerPresent = true;
       accelerometerSensor = sensorList.get(0);

       String strSensor  = "Name: " + accelerometerSensor.getName()
        + "\nVersion: " + String.valueOf(accelerometerSensor.getVersion())
        + "\nVendor: " + accelerometerSensor.getVendor()
        + "\nType: " + String.valueOf(accelerometerSensor.getType())
        + "\nMax: " + String.valueOf(accelerometerSensor.getMaximumRange())
        + "\nResolution: " + String.valueOf(accelerometerSensor.getResolution())
        + "\nPower: " + String.valueOf(accelerometerSensor.getPower())
        + "\nClass: " + accelerometerSensor.getClass().toString();
       textInfo.setText(strSensor);
      }
      else{
       accelerometerPresent = false;
      }

  }

@Override
protected void onResume() {
 // TODO Auto-generated method stub
 super.onResume();

 if(accelerometerPresent){
  sensorManager.registerListener(accelerometerListener, accelerometerSensor, SensorManager.SENSOR_DELAY_NORMAL);
  Toast.makeText(this, "Register accelerometerListener", Toast.LENGTH_LONG).show();
 }
}

@Override
protected void onStop() {
 // TODO Auto-generated method stub
 super.onStop();

 if(accelerometerPresent){
  sensorManager.unregisterListener(accelerometerListener);
  Toast.makeText(this, "Unregister accelerometerListener", Toast.LENGTH_LONG).show();
 }
}

private SensorEventListener accelerometerListener = new SensorEventListener(){

 @Override
 public void onAccuracyChanged(Sensor arg0, int arg1) {
  // TODO Auto-generated method stub

 }

 @Override
 public void onSensorChanged(SensorEvent event) {
  // TODO Auto-generated method stub
  textX.setText("X: " + String.valueOf(event.values[0]));
  textY.setText("Y: " + String.valueOf(event.values[1]));
  textZ.setText("Z: " + String.valueOf(event.values[2]));
 }};
}